
Replacement Filters Must Match Your RO System
Use the full model and existing part numbers to confirm fit. A "five-stage replacement set" may describe the system it serves, not the package contents.
By Erik Sandoval, water-treatment technician · Reviewed August 13, 2026
Editorial note: Product links are included for identification and price-context purposes, not as rankings. No manufacturer paid for placement. Prices and package contents can change, so verify both before ordering.
Buying replacement filters for a reverse osmosis system is not simply a matter of counting stages or finding cartridges that look right. Two systems may both be called “five-stage,” yet use different housings, connections, membrane capacities, or postfilters. Even cartridges with the same nominal dimensions can contain different media or belong in different positions.
Use this order of operations:
- Identify the exact system and its existing components.
- Determine which stages need service.
- Establish whether the filters are proprietary or common-format.
- Verify dimensions, fittings, tubing size, and membrane capacity.
- Audit every item included in the package.
- Compare recurring cost rather than sticker price alone.
- Follow the system manual for installation, flushing, and maintenance.
Know Which RO Component You Are Replacing
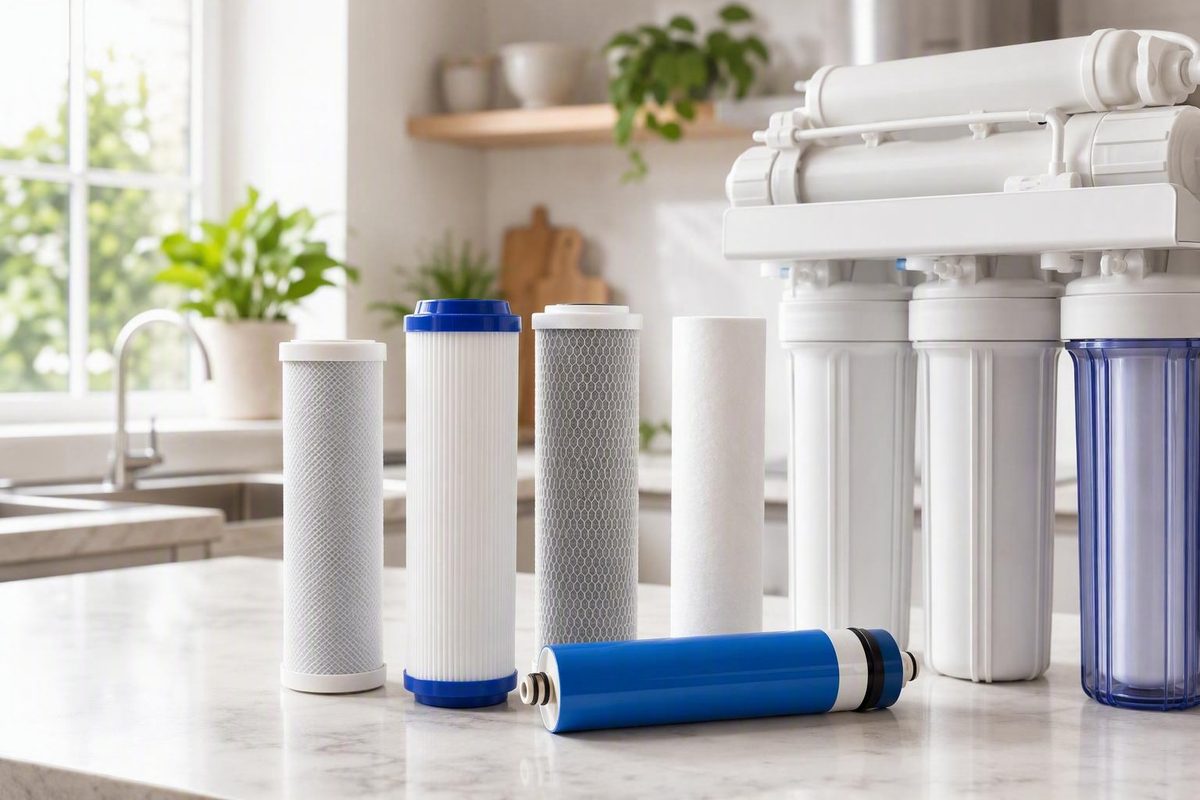
A typical under-sink RO system has several consumable components. They perform different jobs and often follow different replacement schedules.
| Component | Usual location | Function | Identification clues | Commonly sold separately? |
|---|---|---|---|---|
| Sediment prefilter | First housing on the feed-water side | Captures particles such as dirt, sand, and rust | Often white spun or pleated media; may say “sediment” and list a micron rating | Yes; also included in prefilter packs |
| Carbon prefilter | After the sediment filter, before the membrane | Addresses chlorine and taste- or odor-affecting compounds while protecting downstream components | May be labeled GAC, granular activated carbon, CTO, or carbon block | Yes; frequently bundled with sediment filters |
| RO membrane | In a horizontal membrane housing or encapsulated cartridge | Performs the main dissolved-solids separation step | Usually labeled “RO membrane” with capacity in GPD; conventional elements are often longer and narrower than drop-in prefilters | Frequently |
| Inline post-carbon filter | After the membrane and storage tank, near the faucet line | Provides final taste polishing | Small horizontal inline cartridge with threaded or quick-connect ends | Frequently |
| Alkaline or remineralization cartridge | After the membrane, often near the postfilter | Adds a model-specific treatment stage | Labels may include alkaline, pH, mineral, calcite, or remineralization | Usually |
| Ultraviolet component | In a separate powered chamber | Provides the system’s UV stage | Electrical cable, lamp chamber, ballast, lamp, or sleeve part number | Usually |
| Deionization cartridge | Normally after the membrane | Further treats dissolved ions for specialized water uses | Often labeled DI or deionization resin | Usually |
The sediment and carbon filters are prefilters because water reaches them before the membrane. The sediment cartridge captures particles. One or more carbon cartridges then address chlorine and taste- or odor-affecting compounds while helping protect downstream components.
Optional stages create important branches in the buying decision. A six-stage system might add remineralization, while another six-stage system uses UV. Deionization is another distinct option. Each added stage requires its own compatible replacement and should not be assumed to be part of a standard sediment-and-carbon package.
For the same reason, a five-, six-, or seven-stage system does not necessarily come with that number of physical replacement items. A “five-stage replacement set” may describe the system it serves rather than the package contents. It might cover only routine prefilter and postfilter service, with the membrane sold separately.
North Star provides a concrete model-specific example. For the NSROPS system, the company identifies NSROPF as the pre/post-filter set and NSROM as the separate membrane used alongside it. Buying the pre/post set therefore does not replace the membrane identified for that system, according to the North Star NSROPF product information.
Likewise, a three-cartridge package containing sediment, GAC, and CTO carbon-block cartridges appears to be a prefilter-only package when it does not identify either an RO membrane or an inline postfilter. Do not infer missing components from phrases such as “RO replacement set.”
Before shopping, decide which category describes the job:
- Prefilter service: sediment and one or more carbon cartridges.
- Postfilter service: the final inline carbon cartridge.
- Membrane service: the RO element or encapsulated membrane cartridge.
- Routine combined service: prefilters and postfilter, but not necessarily the membrane.
- Complete service: prefilters, membrane, postfilter, and every applicable optional stage.
- Optional-stage service: alkaline, remineralization, UV, or DI components only.
If you do not know which component is due, inspect the labels and consult the model’s maintenance schedule before ordering a nominally “complete” kit.
Start With the System Label, Model, and Existing Part Numbers
Stage count, appearance, a familiar brand, and a similar product name cannot establish compatibility by themselves.
Begin with the system’s identity, not a broad search for “replacement filters for reverse osmosis system.” Record:
- Manufacturer or brand
- Full model number
- Model revision, generation, or suffix
- Serial number or manufacturing date, if present
- Current prefilter part numbers
- Current postfilter part number
- Current membrane part number and capacity
- Optional-stage part numbers
Look for identifiers on the mounting bracket, manifold, tankless-system casing, membrane housing, underside of the unit, or original box. Check the manual, receipt, order history, installer invoice, and labels printed on the existing cartridges. Photograph the labels before removing or wetting components.
Model-based identification matters because manufacturers commonly organize replacements around exact system families. Express Water offers model selections for its filter sets, while APEC separates replacements among RO, ROES, ROTL, ROCT, and other product families. APEC’s model-organized replacement catalog then distinguishes prefilter sets, membranes, postfilters, and complete sets for specified configurations.
Near-match names deserve special caution. ReverseOsmosis.com lists a replacement set for Rainsoft UF-50 and UF-50T systems but expressly excludes the similarly named Ultrafiner II. That documented exclusion shows why a partial model match is not enough; read the entire compatibility statement in the model-specific filter catalog.
Part numbers remain important even when the brand is known. A. O. Smith lists separate RO-related components under codes such as AO-4000-CARBON, AO-RO-RM-R, AO-US-RO-MB-R, AO-US-RO-MEM, and AOS-HERO-S2, but the supplied catalog view does not map every component to a complete system model. Owners still need the manual or another exact compatibility record to connect a listed component to the installed unit; see the A. O. Smith replacement-cartridge catalog.
Printable pre-purchase worksheet
RO REPLACEMENT WORKSHEET

Brand/manufacturer: ______________________________________

Full system model: _______________________________________

Revision, generation, or suffix: __________________________

Serial number or date code: ______________________________

Original purchase date: __________________________________

Current sediment-filter part number: ______________________

Current carbon-prefilter part number(s): __________________

Current membrane part number: _____________________________

Membrane capacity in GPD: _________________________________

Current postfilter part number: ___________________________

Optional stages required:
[ ] Alkaline
[ ] Remineralization
[ ] UV
[ ] Deionization
[ ] Other: _______________________________________________

Stage order from feed side to faucet:
1. _______________________________________________________
2. _______________________________________________________
3. _______________________________________________________
4. _______________________________________________________
5. _______________________________________________________
6. _______________________________________________________
7. _______________________________________________________

Drop-in cartridge dimensions: _____________________________

Membrane dimensions or cartridge format: __________________

Tubing outside diameter: __________________________________

Postfilter connection:
[ ] Threaded
[ ] Quick-connect
[ ] Proprietary
[ ] Unknown

Connector markings or codes: ______________________________

Required O-rings, fittings, battery, lamp, or tools:
___________________________________________________________

Manual or compatibility-page URL: _________________________
When the label is missing, do not jump from “looks like a standard five-stage unit” to a purchase. Continue using existing labels, dimensions, connector details, tubing routes, and photographs. A model-based finder can help once you have reliable identifiers; ESP Water’s visible system-identification tool, for example, asks users to choose the system type, brand, and model before displaying replacement parts.
Determine Whether the System Uses Proprietary or Common-Format Filters
RO replacements fall into two broad physical categories.
Proprietary cartridges are designed around a particular manifold, locking mechanism, or system connection. They may twist into a head, slide into a keyed port, or combine the housing and filter media in one sealed unit. Compatibility is normally established through exact system and cartridge part numbers.
Common-format filters fit broadly used housing or inline arrangements. Examples include drop-in cartridges installed inside reusable sumps and inline postfilters fitted to commonly used tubing. These formats may offer more sourcing choices, but “common” does not mean automatically interchangeable.
A conventional-looking housing is only a clue. You still need to match:
- Cartridge dimensions
- Sediment or carbon media type
- Filtration stage
- Housing design
- End-cap configuration
- Micron or other model-required specification
- Inline-filter connection style
- Tubing size
- Membrane dimensions and capacity
- Manufacturer, certification, or warranty requirements relevant to the system
A nominal 10-by-2.5-inch sediment, GAC, and carbon-block package is an example of a commonly marketed format. One captured marketplace listing described three cartridges in that size and displayed a price of $19.85, but it did not provide a model compatibility list or identify a membrane or postfilter. Its use of “universal” therefore does not prove that the cartridges fit every RO unit; see the three-cartridge marketplace listing.
Some manufacturers recommend genuine replacements designed for their systems, while retailers may emphasize the sourcing flexibility of common-format cartridges. The available evidence does not establish that branded or third-party filters are categorically better. The relevant question is whether the exact replacement fits, performs as required in the documented configuration, and carries any certification or warranty documentation the owner needs.
If certification matters, request the exact certification record for the specific cartridge or complete-system configuration.
| Consideration | Model-specific or proprietary cartridge | Common-format cartridge |
|---|---|---|
| Identification | Often straightforward when the exact model and revision are known | Requires verification of dimensions, media, stage, and connection details |
| Physical installation | Designed for a particular manifold or cartridge head | Usually installed in a reusable housing or standard inline arrangement |
| Sourcing | May be limited to designated parts or sellers | May offer more brands and suppliers |
| Risk when the system is unknown | High if the cartridge family or revision is guessed | Also high; similar dimensions do not prove compatibility |
| Performance assurance | Depends on using the supported configuration | Depends on matching specifications and checking applicable documentation |
| Best use case | Clearly identified system with an authoritative part-number match | Clearly identified housing and component specifications |
If the system cannot be identified, take a complete photo set:
- Full system assembly showing the overall layout.
- System label, bracket, manifold, and date or serial markings.
- Lower-housing layout in order from the feed-water side.
- Every printed code on the installed cartridges.
- Membrane housing and cap.
- Membrane label, if the manual permits owner access.
- Tubing routes between the feed, housings, membrane, tank, postfilter, and faucet.
- Close-ups of both ends of the inline postfilter.
- Connector markings and measured tubing outside diameter.
- Optional alkaline, UV, remineralization, or DI components.
Do not rely on test-fitting as an identification method. First read the seller’s return policy and ask whether opening the package affects eligibility. If the evidence remains incomplete, send the photo set and worksheet to the manufacturer or a qualified supplier and request written compatibility confirmation.
Match Dimensions, Connections, and Membrane Capacity
The model number is the best starting point, but physical and hydraulic specifications provide an important cross-check—especially for older, relabeled, or privately branded systems.
Use this fit checklist:
- [ ] Correct cartridge category: drop-in, encapsulated, inline, or membrane
- [ ] Correct length and diameter
- [ ] Correct filtration stage and media
- [ ] Correct reusable housing or proprietary manifold design
- [ ] Correct end-cap or cartridge-head interface
- [ ] Correct threaded, quick-connect, or proprietary connector
- [ ] Correct tubing outside diameter
- [ ] Correct membrane construction and physical format
- [ ] Correct system-supported capacity in gallons per day
- [ ] Correct optional-stage specification
- [ ] Exact compatibility confirmation where the manufacturer requires it
A drop-in cartridge is a replaceable element placed inside a reusable housing. The housing and its seal remain part of the system.
An encapsulated proprietary cartridge combines the filter and its pressure-containing shell. It normally attaches directly to a matching manifold through a keyed, twist-lock, or other model-specific connection.
An inline postfilter is a sealed cartridge installed in the tubing path. It may have threaded ports that accept removable fittings or built-in quick-connect ports that accept tubing directly.
A membrane element fits into a dedicated membrane housing unless the system uses an encapsulated membrane cartridge. It is not interchangeable with an ordinary sediment or carbon filter.
Threaded and quick-connect postfilters
On some threaded designs, existing fittings can be removed from the old postfilter and transferred if the manufacturer permits and the fittings remain suitable. A quick-connect postfilter instead needs ports that accept the correct tubing size and connection geometry.
Quick-connect tubing is generally identified by its outside diameter. Retailer guidance gives 1/4-inch and 3/8-inch tubing as common RO examples and distinguishes removable threaded fittings from direct quick-connect ends.
Thread identification works differently. Measured outside diameter is not the same as nominal fitting size. Water eStore provides the following source-specific identification guidance:
- About 0.405 inch measured outside diameter for a nominal 1/8-inch fitting
- About 0.540 inch for a nominal 1/4-inch fitting
- About 0.675 inch for a nominal 3/8-inch fitting
Those figures are identification guidance from one retailer, not a universal sizing rule for every fitting family. Thread standard, pitch, taper, gender, and adapter design may also matter. Do not order a fitting solely because its ruler measurement resembles a nominal fraction; consult the RO fitting and filter identification guide.
Membrane size and capacity
Many conventional membrane housings use elements around 1.8 by 12 inches, but proprietary and encapsulated designs can differ. A conventional-looking housing does not promise that every element of those approximate dimensions will work.
Match both:
- The required physical membrane format.
- The system-compatible production capacity, stated in gallons per day (GPD).
Residential RO membrane capacity in this context should not be expressed in gallons per minute. Examples such as 50 GPD and 75 GPD are daily production ratings.
If the rating is unknown, consult the manual before opening the membrane housing. If the documented procedure permits owner access, remove the membrane as instructed and read its printed label rather than inferring capacity from the system name. Retailer guidance similarly advises matching the physical format and existing GPD rating and notes the approximately 1.8-by-12-inch format used by many conventional systems.
A same-size membrane with a different GPD rating is not automatically a safe upgrade. Without system-specific instructions, match the supported rating or obtain confirmation for the complete conversion.
Compare Replacement Kits by Contents, Not Sticker Price
RO listings generally fit one of five package types:
- Prefilter-only packs: sediment and carbon cartridges installed before the membrane.
- Postfilter replacements: one inline polishing filter.
- Membrane-only products: a membrane element or proprietary membrane cartridge.
- Membrane-inclusive kits: routine filters plus an RO membrane.
- Complete optional-stage sets: filters, membrane, postfilter, and applicable alkaline, remineralization, UV, or DI components.
Words such as “replacement set,” “complete,” “five-stage,” and “universal” are not package manifests. Audit the listing line by line.
| Package question | What to verify |
|---|---|
| How many physical items are included? | Count cartridges, membranes, lamps, sleeves, batteries, and accessory bags |
| Which stages are covered? | Sediment, GAC, carbon block, membrane, post-carbon, alkaline, DI, or another stage |
| Is the membrane included? | Look for an explicit membrane part number and GPD rating |
| Is the postfilter included? | Confirm the inline-filter type and connections |
| Are optional stages covered? | Match alkaline, remineralization, UV, and DI components separately |
| Are installation parts included? | Check for O-rings, fittings, clips, lubricant, batteries, wrench, or flow-control parts |
| What system does it fit? | Confirm exact brand, model, revision, and stated exclusions |
| What quantity is being purchased? | Distinguish one service set from multiple sets or a subscription quantity |
| What are the return conditions? | Check the time limit, package-opening rules, restocking terms, and return shipping |
Price note: The figures below come from catalog captures reviewed for this article on August 13, 2026. They are not live quotes. Recheck the price, selected configuration, contents, availability, shipping, and return terms immediately before publication or purchase.
The captured three-cartridge 10-by-2.5-inch sediment/GAC/carbon-block pack was displayed at $19.85. Express Water displayed starting prices of $34.99 for a standard set, $68.99 for an alkaline set, $103.99 for a UV set, and $126.99 for an alkaline-plus-UV set. Those options cover different configurations and cannot be treated as equivalent products; check the current selections in the Express Water filter-set catalog.
APEC’s captured catalog displayed selected stage 1–3 sets at $29.95 and $44.95, while selected complete stage 1–5 sets were displayed at $127.95. A prefilter set and a membrane-inclusive set do not contain the same components, so their sticker prices do not establish equivalent value.
A useful comparison converts each component to an estimated annual cost:
Annualized component cost = purchase price ÷ expected service interval in years
Then calculate:
Estimated annual system cost = sum of annualized component costs + annual shipping + expected service charges
Do not divide an entire kit by the membrane interval when the prefilters and postfilter are replaced more often. Separate the items according to how frequently each one is actually purchased.
Include these costs where applicable:
- Prefilter replacements per year
- Postfilter replacements per year
- Annualized membrane cost
- Alkaline or remineralization replacement
- UV lamp or related UV maintenance component
- DI resin or cartridge
- Shipping
- Installation or service
- O-rings and other recurring supplies
Worked compatibility screen
Suppose the worksheet identifies a housing-based system with three 10-by-2.5-inch lower cartridges, a separate 50 GPD membrane, and a 1/4-inch quick-connect postfilter.
| Candidate listing | Initial result | Reason |
|---|---|---|
| Three-cartridge sediment/GAC/CTO pack | Possible prefilter candidate only | Dimensions and media appear relevant, but the listing still needs an exact housing and specification match; it does not identify a membrane or postfilter |
| “Five-stage complete set” with no itemized contents | Reject pending clarification | Stage count does not reveal whether the membrane or correct postfilter is included |
| Model-confirmed set with three prefilters, a 50 GPD membrane, and a 1/4-inch quick-connect postfilter | Shortlist | The major components match, subject to exact dimensions, part numbers, fittings, and documented system compatibility |
This process does not rank products. It eliminates listings that fail to document the required fit variables.
Avoid using price, reviews, popularity, or stock status as evidence of compatibility or filtration quality. A low-priced prefilter pack is not directly comparable with a membrane-inclusive set, and a heavily reviewed cartridge does not become compatible with a different manifold.
Final checkout checklist
- [ ] Exact system model and revision are named.
- [ ] Every package item and quantity is listed.
- [ ] Membrane inclusion or exclusion is explicit.
- [ ] The membrane’s supported GPD rating matches.
- [ ] The postfilter and its connections match.
- [ ] Every optional stage is covered or intentionally excluded.
- [ ] Required fittings, O-rings, batteries, and tools are accounted for.
- [ ] Shipping is included in the cost comparison.
- [ ] Current return terms have been checked.
- [ ] The seller has clarified whether opening the package affects return eligibility.
Build a Replacement Schedule for Each Filter Stage
Replacement intervals are planning ranges, not universal deadlines. The installed system’s manual and model-specific instructions should control.
| Component | Broad planning range | Main scheduling caution |
|---|---|---|
| Sediment prefilter | Around 6–12 months | High sediment load may shorten service; this is a generic maintenance range from Clean Water of Virginia |
| Carbon prefilter | Around 6–12 months | Water chemistry, chlorine exposure, and usage may affect timing |
| Inline postfilter | Around 12 months | Follow the model schedule and investigate taste or odor changes rather than relying on the calendar alone |
| RO membrane | Roughly 1–5 years | The range spans differing model-specific and generic recommendations, including the broader estimate in Shell Water Systems’ maintenance guide |
| Optional stages | Model-specific | Alkaline, UV, DI, and remineralization components follow their own instructions |
The membrane recommendations in the available sources differ numerically and are not directly comparable. Express Water recommends 12–24 months for its membranes. North Star recommends 1–2 years under softened-water conditions and notes that unsoftened water may require earlier service. Clean Water of Virginia gives a generic 2–3-year estimate, while Shell Water Systems gives a generic 2–5-year estimate. These are manufacturer- or vendor-specific recommendations with different assumptions, not a single universal rule.
North Star also recommends six-month pre/post-filter replacement under softened-water conditions. Its instructions describe some proprietary connections as having automatic shutoffs, so those particular systems do not require the same supply-shutdown procedure used by many housing-based systems. Both the interval and shutdown exception are model-specific; consult the North Star maintenance instructions.
Conditions that may shorten service life include:
- Higher household water consumption
- Elevated sediment load
- Chlorine concentration and exposure
- Hardness
- Source-water quality
- Whether the incoming supply is softened
- Pressure or flow conditions
- Periods of unusually high demand
Prefilters do not necessarily need to be replaced at the same time as the longer-lived membrane. Treat each component as a separate maintenance item.
| Stage/component | Installation date | Manufacturer interval | Observed conditions | Reminder date | TDS baseline, if used | Flow, taste, or service notes |
|---|---|---|---|---|---|---|
| Sediment prefilter | N/A | |||||
| Carbon prefilter 1 | N/A | |||||
| Carbon prefilter 2 | N/A | |||||
| RO membrane | ||||||
| Post-carbon filter | Optional | |||||
| Alkaline/remineralization | Optional | |||||
| UV component | N/A | |||||
| DI cartridge | Optional |
Set the first reminder from the manufacturer’s interval, then record observations rather than silently changing the date. Notes such as “higher sediment after well work,” “household usage increased,” or “flow declined before scheduled service” can help with future troubleshooting.
Do not assume that an overdue cartridge automatically makes the water hazardous. A missed date calls for inspection and maintenance, but the calendar alone does not establish the condition of the water or system.
Use Symptoms and TDS as Clues, Not Final Diagnoses
Performance changes can justify early inspection, but most symptoms have several possible causes.
| Symptom | Components or conditions to check | What the symptom does not prove |
|---|---|---|
| Reduced faucet flow | Loaded prefilters, feed pressure, valves, tank pressure or condition, tubing, faucet, connections | That the membrane alone has failed |
| Taste or odor change | Postfilter age, flushing, sanitation needs, carbon stages, source-water change | That dissolved-solids rejection has necessarily declined |
| Discoloration | Sediment cartridge, disturbed supply, carbon fines, housings, tubing | The identity of one failed stage |
| Cloudy water | Trapped air after service, flushing needs, pressure, system condition | Membrane failure by itself |
| Leaks | O-rings, housing threads, tubing cuts, quick-connect engagement, damaged fittings | That the cartridge media is defective |
| Changing TDS | Feed-water TDS, product-water TDS, sampling conditions, membrane performance, pressure | That a particular contaminant is present or absent |
Check basic system conditions before attributing the symptom to an expensive membrane.
An unusual taste or odor may justify checking the postfilter, service history, flushing, and model-specific sanitation guidance. It does not conclusively diagnose membrane failure.
Black or gray water immediately after a new carbon filter is installed can result from loose activated-carbon particles. North Star specifically instructs owners to purge new filters and notes that skipping the purge can initially produce black-looking water. Follow the model’s flushing or purge procedure rather than guessing at a duration or volume.
A TDS meter measures total dissolved solids. It can help track a system’s performance, but it cannot identify individual dissolved substances or prove that specific contaminants are absent. Express Water recommends TDS as an additional maintenance indicator while also directing owners to follow the system’s replacement instructions.
For a useful comparison:
- Establish a baseline when the system is known to be operating as intended.
- Measure feed water and product water under comparable conditions.
- Use the same meter and sampling method.
- Allow the system to return to normal operation after service or prolonged non-use.
- Record the results and compare the trend with the manufacturer’s specifications.
A basic tracking calculation is:
Apparent TDS reduction (%) = (feed-water TDS − product-water TDS) ÷ feed-water TDS × 100
Treat the result only as a performance indicator. Do not apply one universal membrane-rejection cutoff unless the manufacturer establishes it for the model.
If several symptoms occur together—or if flow, taste, leakage, or TDS performance does not recover after correctly performed routine service—inspect the complete system and consult model-specific support rather than repeatedly replacing parts by guesswork.
Replace Filters Carefully and Verify the System Afterward
The following is a generic checklist, not a substitute for the system manual. Cartridge order, shutdown steps, sanitation, membrane access, and flushing requirements vary.
Before starting
Confirm cartridge order and flow direction. Compare every new label and connection with the old component before opening all packages. Gather any model-required supplies:
- Housing wrench
- Correct replacement O-rings
- Manufacturer-approved lubricant
- Towels and a bucket
- Model-approved sanitation materials
- Replacement fittings or locking clips
- Faucet reminder battery
- UV components, if applicable
- Cartridge labels or a marker for recording the date
Do not apply an unspecified lubricant or sanitation chemical. Use only materials and procedures documented as compatible with the system.
Generic housing-based workflow
- Review the manual and identify the feed-water valve, tank valve, faucet, housings, membrane housing, and tubing routes.
- Isolate the water supply as directed.
- Close the storage-tank valve if instructed.
- Open the RO faucet to relieve pressure.
- Place towels and a bucket beneath the unit.
- Remove one housing at a time and note each cartridge’s position and orientation.
- Remove the old cartridge.
- Inspect the housing, threads, O-ring groove, O-ring, tubing, and connectors.
- Clean or sanitize only according to model instructions.
- Install the replacement cartridge centered and fully seated.
- Refit the housing and tighten it snugly rather than excessively.
- Repeat in the required stage order.
- Replace the membrane or inline filter only according to its separate procedure.
Generic housing-based guidance supports isolating the supply, relieving pressure, inspecting connections, seating cartridges correctly, restoring the water, flushing, and checking for leaks. These precautions are summarized in Shell Water Systems’ maintenance instructions.
Inspect seals for visible cuts, stretching, displacement, or damage. Replace a damaged O-ring with the correct part and ensure it is seated in its groove. Excessive tightening does not compensate for a damaged or displaced seal and may contribute to housing or sealing problems.
Shutdown procedures are not identical across systems. Many housing-based systems require supply isolation and pressure relief before opening a housing. The North Star automatic-shutoff exception described earlier is model-specific. Follow the installed system’s manual rather than transferring that exception to another design.
After installation
- Confirm that housings, cartridges, fittings, and locking clips are in their correct positions.
- Restore the water supply according to the manual.
- Open the required feed and tank valves.
- Observe every housing seam, tube, and fitting as pressure returns.
- Flush or purge for the model-specified period or volume.
- Discard the initial water when instructed.
- Check flow and listen for unusual operation.
- Inspect again after the system has refilled and reached normal pressure.
- Recheck later for seepage.
An initially dry fitting should not end the leak check.
Follow the manufacturer’s procedure rather than improvising.
Seek manufacturer or professional support when:
- The unit uses a proprietary manifold you cannot identify.
- The membrane procedure is unclear.
- Fittings, tubing, housings, or threads are damaged.
- A leak persists after correct reseating and seal inspection.
- The system fails to restart or refill.
- UV or other electrical components require work beyond the manual.
- Certification or warranty requirements remain uncertain.
Frequently Asked Questions
Are 10-by-2.5-inch RO cartridges universal?
No. The dimensions describe a widely marketed physical format, but they do not prove compatibility.
A replacement must still match the reusable housing, filtration stage, media type, end configuration, and model requirements. Two nominally 10-by-2.5-inch cartridges may serve different purposes, such as sediment filtration, granular activated carbon treatment, or carbon-block treatment.
Treat “universal” as a marketing claim that requires verification. Proprietary manifolds generally use their own cartridge interfaces rather than ordinary drop-in filters.
Does an RO replacement filter set normally include the membrane?
Not necessarily. Many packages cover only sediment and carbon prefilters. Others add the inline postfilter while still selling the membrane separately. A membrane-inclusive set should explicitly identify the membrane and its compatible GPD rating.
Read the package contents rather than relying on “complete,” “five-stage,” or “replacement set.” In the North Star example, NSROPF is the pre/post-filter set, while NSROM is the separate membrane used with the NSROPS system.
Should a replacement RO membrane have the same GPD rating as the old one?
As a compatibility-first rule, match the physical format and system-supported GPD rating unless the manufacturer approves a different configuration.
A different-capacity membrane may affect more than physical fit. The system’s flow restriction and other hydraulic requirements may also need evaluation. Do not treat a higher-GPD membrane as a drop-in upgrade without model-specific confirmation.
If the rating is unknown, check the manual and then read the existing membrane label using the documented removal procedure.
Can a TDS meter tell me when the RO membrane needs replacement?
It can provide a useful performance clue when feed-water and product-water measurements are tracked against an established baseline. A rising product-water reading or declining apparent reduction may justify inspection.
A TDS meter cannot identify individual contaminants, prove that the water is safe, or establish one universal replacement threshold for every membrane. Use it alongside the service history, operating conditions, manufacturer specifications, and other symptoms.
Do I have to shut off the water before changing RO filters?
For many housing-based systems, the generic procedure is to isolate the supply, close the tank if instructed, and relieve pressure before opening a housing. Not every design uses that procedure: some proprietary cartridge connections incorporate automatic shutoffs.
Follow the exact manual for the installed model. If the shutdown process is unclear, stop and obtain manufacturer or qualified supplier guidance before loosening a housing or connection.
The final order of operations is straightforward: identify the exact system and existing parts; determine whether the cartridges are proprietary or common-format; verify every dimension and connection; match the membrane’s compatible GPD rating; audit the package contents; compare annualized rather than sticker cost; and follow the model manual for installation and flushing. If any fit variable remains uncertain, pause the purchase and obtain confirmation instead of relying on appearance or a “universal” label.