
How to Fill Your 1/2-Barrel Keg by Valve Type
The supported Sanke method uses a matching coupler and pressure-rated fermenter; removable-lid kegs follow another workflow. Fill by weight and retain headspace.
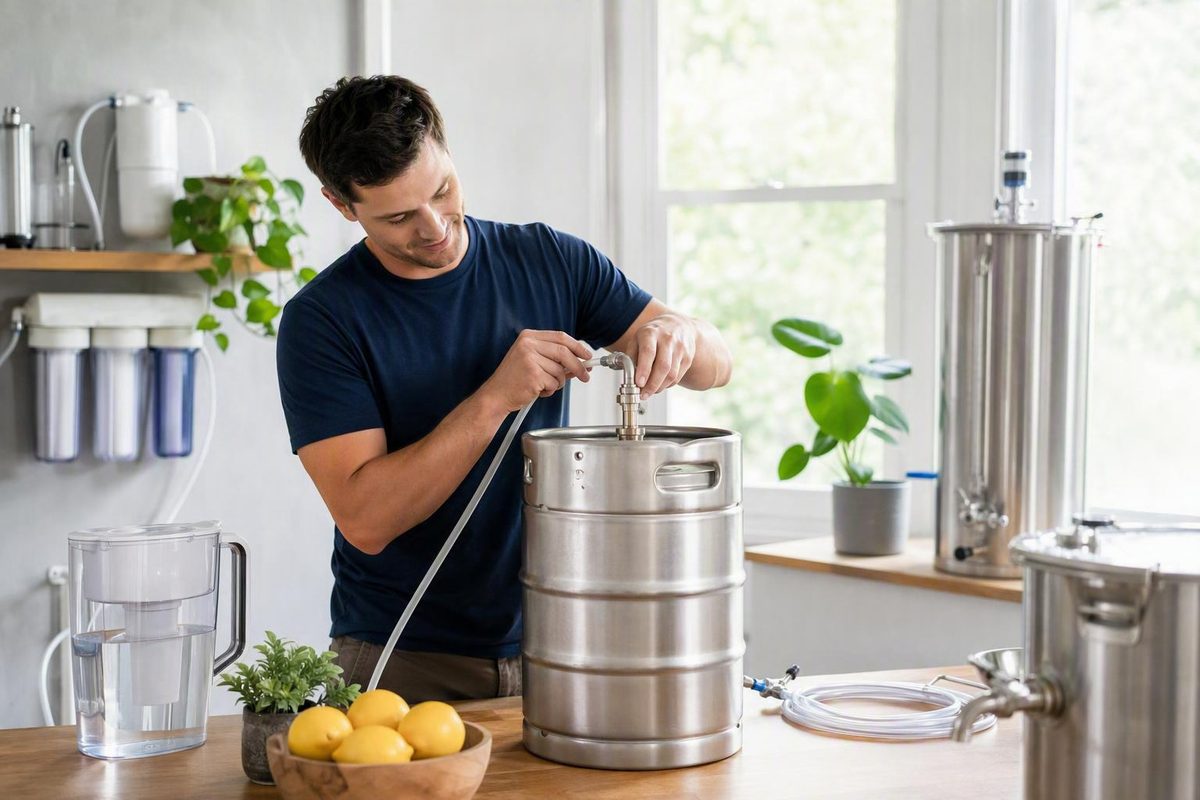
A nominal U.S. 1/2-barrel keg holds up to 15.5 gallons, approximately 58.7 liters. The conventional commercial version is commonly a sealed Sanke keg with one top valve and an internal spear, not an oversized Cornelius keg with a removable lid and separate posts. That hardware difference determines how the keg can be cleaned, connected, and filled. Keg guides distinguish the full-size Sanke format from removable-lid homebrew kegs.
For a personally owned Sanke keg, the supported home-scale approach is to transfer beer from a suitable pressure-rated fermenter through a matching coupler. The receiving keg must already be internally clean, sanitized, and prepared with CO2. During filling, beer travels through the coupler’s beverage path and down the spear while displaced gas leaves through a controlled gas path. Monitor the fill by weight, retain headspace, and isolate both paths before disconnecting.
This is a model-dependent workflow, not universal authorization for modifying couplers or operating pressure equipment. Before using it, obtain the instructions for your exact keg, coupler, fermenter, regulator, valves, hoses, and fittings. If those instructions do not permit reverse filling or do not explain the required venting and isolation arrangement, stop and consult the manufacturer or a qualified keg-service technician.
This guide does not cover spear removal.
First identify exactly what kind of half-barrel keg you own
Do not buy a coupler or copy a filling procedure until you have identified the valve and access arrangement.
A conventional Sanke keg normally has:
- One circular valve assembly at the top
- An internal spear extending toward the bottom
- Gas and beverage flow handled through that single valve
- No removable oval lid
- No separate gas-in and liquid-out posts
A Cornelius-style keg normally has a removable lid and separate gas and beverage posts. A hybrid may combine removable access with a Sanke-compatible valve. Similar capacities do not make these configurations interchangeable.
Sanke D is common in North America, but “half-barrel” describes capacity rather than valve type. Some full-size commercial kegs require A-type or other couplers. Inspect the valve, identify the keg or valve manufacturer where possible, and match the coupler to the fitting rather than inferring it from keg size. A full-size-keg guide lists both A- and D-type couplers.
Choose the correct branch
1. Conventional sealed Sanke keg: One top valve, an internal spear, and no removable lid. Use the conditional pressure-transfer workflow in this article only if the exact equipment documentation permits it.
2. Removable-lid ball-lock or pin-lock keg: Separate gas and liquid posts plus direct interior access. Use the Cornelius-style workflow later in this article.
3. Hybrid keg: Removable access combined with a Sanke-compatible valve or other mixed hardware. Follow the keg manufacturer’s instructions for cleaning, assembly, pressure limits, and permitted filling paths. Do not assume either generic workflow applies unchanged.
Confirm ownership before proceeding. Commercial kegs may circulate through brewery exchange or lease arrangements and may remain brewery property. Do not refill, modify, dismantle, or service one without authorization from its owner. Retailer guidance comparing homebrew and commercial kegs notes that commercial Sanke kegs commonly remain in lease or exchange systems. Establish ownership before doing any work.
Inspect the visible valve and sealing area. Stop if:
- The valve type cannot be identified
- The valve sticks or does not seal
- Sealing surfaces appear damaged
- The keg’s ownership or service history is uncertain
- The keg’s working-pressure marking cannot be established
- The required model-specific instructions are unavailable
Valve or spear work requires complete depressurization, model-specific procedures, and suitable expertise. Generic spear-removal instructions may be inappropriate for a different valve design.
The main Sanke workflow assumes that:
- You own the keg or have explicit authorization to use it.
- The valve and matching coupler have been positively identified.
- The keg has been internally cleaned and sanitized by a process applicable to that keg.
- The beer is in a suitable pressure-rated fermenter.
- The exact coupler documentation permits the intended reverse-flow arrangement.
- The manufacturer instructions define how the receiving gas is controlled and vented.
- Every component is approved for the intended beverage, gas, pressure, and connection arrangement.
If any prerequisite is missing, resolve it before transferring beer.
Decide whether your beer source supports a closed Sanke transfer
The directly supported Sanke method transfers beer from a pressure-rated fermenter through a coupler. The source must remain at a controlled pressure above the receiving keg, and displaced gas must have a controlled exit. If the vessels equalize without gas leaving the receiver, flow stops.
Use the following source-vessel decision tree.
Cold, carbonated beer in a pressure-rated vessel
This is the closest match to the demonstrated Sanke workflow. Maintaining pressure during a gentle transfer helps limit foaming and preserve existing carbonation. Keeping the beer cold also helps because colder beer retains dissolved CO2 more readily.
Cold, carbonated beer transferred while pressure is maintained may need little or no immediate CO2 adjustment. That is an outcome to verify after stabilization, not a guarantee. Foaming, pressure loss, temperature change, transfer time, and the beer’s initial condition can alter the result.
Uncarbonated beer in a pressure-rated fermenter
Regulated pressure can move the beer if the fermenter and all connected components are approved for the planned operation.
Transfer pressure only creates the pressure difference needed for flow. It does not automatically establish the beer’s final carbonation. After filling, chill the keg and select carbonation pressure from the beer’s actual temperature and desired CO2 level.
Beer in an unpressurized bucket or carboy
Open-lid siphoning is commonly described for removable-lid Cornelius kegs because sanitized tubing can be lowered through the open lid. That method does not translate directly to a sealed Sanke keg.
The available Sanke procedure does not establish a complete low-oxygen method for connecting an ordinary unpressurized bucket or carboy directly to a sealed Sanke. Do not remove the spear, pressurize an ordinary bucket, or improvise a pressure lid to adapt Cornelius instructions.
Practical alternatives are to:
- Move the beer into an appropriate pressure-rated vessel before the Sanke transfer
- Use purpose-designed equipment approved for the source vessel
- Package the beer in a removable-lid homebrew keg
- Ask a qualified kegging supplier or brewery technician to design a compatible transfer path
Keep three pressure decisions separate:
- Transfer pressure creates controlled flow between the source and receiving vessels.
- Carbonation pressure is selected from beer temperature and desired dissolved CO2.
- Serving pressure works with the finished draft system and its line resistance.
These settings may occasionally be similar, but they solve different problems. There is no universal PSI that correctly fills, carbonates, and serves every keg.
Before assembly, locate the working-pressure limits and instructions for the fermenter, keg, coupler, regulator, hose, fittings, valves, and accessories. Operate the complete system only within the limits and configurations permitted for every component. Do not rely on appearance, previous use, or an uncited pressure example.
Gather the coupler, transfer, pressure, and measuring equipment
For a conventional Sanke transfer, assemble:
- A coupler that exactly matches the keg valve
- A coupler configuration whose documentation expressly permits reverse filling
- Manufacturer-approved controls for the beverage and receiving-gas paths
- Sanitized food-grade beverage hose
- A sanitary connection compatible with the fermenter outlet
- A regulated CO2 supply approved for the vessel and beverage system
- A documented, controlled receiving-gas vent arrangement
- Manufacturer-approved liquid-backflow protection where required
- A scale that can support the complete filling setup
- Cleaner and sanitizer compatible with the equipment
- A clean sanitary cap for the keg valve
- Leak-detection solution approved for the relevant components
- The tools specified by the equipment manufacturers
- A stable platform with clear access to all controls and connections
Use only a clean, beverage-compatible gas and pressure arrangement expressly approved by the relevant manufacturers.
The functional flow is:
Regulated CO2 → pressure-rated source vessel
→ sanitized beer hose → coupler beverage side
→ keg spear → bottom of keg

Keg headspace → coupler gas side
→ manufacturer-approved controlled vent
Beer is sent backward through the coupler’s normal dispensing path and down the spear. Displaced gas leaves through the coupler’s gas side, allowing the transfer to continue without opening the keg.
Some dispensing couplers contain a liquid check ball and gas check intended to prevent reverse flow. In BREWHA Equipment’s Sanke-filling demonstration, those checks are removed so beer can travel backward and displaced gas can leave; the demonstrated arrangement also uses controls on both paths. Review the demonstrated coupler arrangement and transfer sequence.
That demonstration does not authorize check removal from every coupler. Before changing anything:
- Identify the exact coupler model.
- Obtain its manufacturer’s service and filling instructions.
- Confirm that reverse filling is permitted.
- Confirm the required checks, seals, valves, and backflow controls.
- Determine how any removed parts must be reinstalled before dispensing.
- Do not alter an unidentified, damaged, rented, or non-serviceable coupler.
If the manufacturer’s documentation is silent or contradictory, use a purpose-built filling coupler or seek technical assistance rather than improvising.
Backflow controls are also model-specific. The evidence available here does not establish one arrangement suitable for every regulator and coupler. Follow the regulator, coupler, and valve manufacturers’ instructions for preventing liquid from reaching gas-side equipment.
Dry-fit the connections before introducing beer. Verify that hoses, clamps, threads, gaskets, adapters, and shutoffs are compatible. Assemble and leak-test the pressure side using only a procedure and test pressure allowed by the component manufacturers. Correct persistent bubbling or another indicated leak before beer is connected.
Place the empty keg on the scale near its intended storage or refrigeration location. A filled half-barrel contains a large volume and is difficult to reposition. Filling it in place also reduces the chance that moving hoses will disturb the scale reading.
CO2 venting limitation
The available kegging sources establish that displaced gas must be vented for transfer to continue, but they do not establish complete ventilation or confined-space requirements for releasing CO2. Before proceeding, obtain and follow the gas supplier’s instructions, the equipment manufacturers’ venting requirements, and any applicable local safety rules.
Do not begin if you cannot provide the ventilation and vent routing those instructions require.
Prepare the keg and transfer path without confusing cleaning with sanitizing
Cleaning and sanitizing are separate operations.
The supported Sanke workflow assumes the receiving keg has already been internally cleaned, sanitized, and prepared. Because a conventional Sanke keg cannot be opened for ordinary visual inspection, establish an acceptable process through one of these routes:
- The keg manufacturer’s cleaning documentation
- A documented keg-washer cycle expressly applicable to the keg
- Records from a qualified professional keg-cleaning service
- A known service history showing the keg was cleaned, inspected, and stored appropriately
Follow the chemical manufacturer’s concentration, temperature, contact-time, material-compatibility, drainage, and rinse instructions. Do not substitute a generic internet cycle for the instructions governing the actual chemical and keg.
Immediately before transfer, sanitize every beer-contact point:
- The keg interior under the established process
- The keg valve and coupler-contact area
- The coupler’s beverage path
- The transfer hose
- The fermenter outlet or racking port
- Every beer-contact fitting, gasket, adapter, and valve
- Any collection fitting used while clearing the source port
A racking port may retain yeast or sediment. Before connecting it to the keg, briefly flush the source path into a waste container. Discard only enough beer to clear visible sediment and establish clean flow; the relevant demonstration’s published quantity is ambiguous and should not be treated as universal.
Prepare the receiving keg with CO2 using the validated method for your equipment. A CO2-prepared keg and closed, bottom-up transfer reduce splashing and oxygen exposure, but they do not guarantee oxidation-free beer. Poor preparation, leaks, loose connections, or an interrupted transfer can still introduce air.
Before connecting:
- Set all documented beverage and gas-path controls to their required closed or isolated positions.
- Verify that the keg is at a known pressure compatible with the equipment-specific transfer plan.
- Confirm that the source pressure is regulated.
- Confirm that the receiving-gas path can be controlled as required by the manufacturers.
- Verify that the scale is stable and readable.
- Put every required shutdown control within immediate reach.
Stop if internal cleanliness cannot be verified, the valve does not engage or seal correctly, or the keg’s service history remains uncertain. Have the keg professionally cleaned or serviced rather than risking the batch.
Fill the Sanke keg through the coupler: the valve sequence
The sequence below summarizes the available Sanke-filling demonstration. Use it only where the exact keg, coupler, fermenter, regulator, valve, and hose documentation permits the same arrangement. Manufacturer instructions take precedence, including any different connection, isolation, or shutdown order.
1. Position the setup and record the tare
Place the empty keg on the scale. Add everything that will remain supported by the scale during filling, including the coupler, platform, tray, and any hose sections resting on it.
Record that combined reading as the tare. Arrange the hoses so they will not progressively pull on or settle onto the platform.
2. Sanitize the transfer path
Sanitize the fermenter outlet, transfer hose, fittings, coupler beverage path, keg valve, and coupler-contact surfaces. Protect sanitized parts from hands, floors, tools, and untreated work surfaces.
If necessary, flush the source port until visible sediment clears.
3. Make the documented connections
Place all coupler-path controls in the isolated positions specified by the manufacturer.
Connect the sanitized beverage hose to the fermenter outlet and the coupler’s beverage connection. Engage the matching coupler on the keg according to its instructions. Do not force an uncertain coupler onto the valve.
Use only pressures and configurations allowed by every component’s documentation.
4. Apply regulated pressure to the source
Apply regulated CO2 to the pressure-rated fermenter. The source must remain modestly above the receiving-keg pressure for beer to move.
Do not copy the pressure shown in a demonstration unless the manufacturers of your complete setup approve it.
5. Open the beverage path
Open the documented beverage path. Beer can now travel through the hose, backward through the approved coupler configuration, and down the spear.
Flow may initially be slow or absent if displaced gas does not yet have an exit.
6. Open the receiving-gas path gradually
Partially open the manufacturer-approved receiving-gas vent or control. Open it only enough for displaced gas to leave and gentle flow to begin.
The Sanke demonstration warns that venting too quickly can lower receiving pressure and promote foaming, especially with carbonated beer. Follow the documented venting method and the separate gas-safety instructions applicable to your location and equipment.
7. Monitor continuously
Watch:
- The scale reading
- Beer movement in the hose
- Source and receiving pressures
- Every hose and fitting
- The receiving-gas path
- Signs of leakage or foaming
- The scale platform and hose positions
Maintain a small, controlled pressure difference. If flow slows or stops, isolate the system as directed and diagnose the cause rather than increasing pressure against an unknown obstruction.
Remain present and able to operate every shutdown control throughout the transfer.
8. Slow near the target weight
As the calculated target approaches, reduce flow using the controls authorized for the equipment. Stop by weight before beer reaches the receiving-gas path.
Do not use beer emerging from the gas vent as the normal indication of fullness.
9. Isolate both paths
Close or isolate the beverage and gas paths in the order specified by the coupler manufacturer. Confirm physically that neither path remains uncontrolled before touching the coupler connection.
The available demonstration closes both paths before removal, but it does not establish a universal beverage-first shutdown order for every coupler.
10. Remove, clean, sanitize, and cap
Disengage the coupler according to its instructions. Rinse beer residue from the valve area without directing contamination into the valve. Sanitize the valve and coupler-contact surface, then fit a clean sanitary cap.
The sequence matters: controlled gas release permits flow, gradual venting helps limit pressure loss and foaming, weight monitoring prevents overfill, and isolation before removal reduces spills and uncontrolled release.
Pressure warning: Never open, disassemble, internally adjust, or service a pressurized keg, spear, valve, coupler, regulator, or fitting. Isolate the gas supply and use the exact manufacturer-approved depressurization procedure before service. American Homebrewers Association kegging guidance likewise requires full depressurization before opening or disassembly because residual pressure can cause injury. Review the pressure warning in its kegging guidance.
Calculate the fill by weight and preserve headspace
Weight is the preferred fill indicator because a sealed Sanke does not provide a direct view of the liquid level.
Use this planning formula:
Target scale reading = measured setup tare + intended beer mass
The tare must include everything affecting the scale reading:
- Empty keg
- Coupler, if attached during filling
- Platform or tray
- Hose sections resting on the platform
- Other supported fittings or equipment
If hose weight shifts onto or off the scale during filling, the displayed gain is not entirely beer. Arrange the setup before recording the tare.
For rough planning, one liter of beer can be treated as close to one kilogram. The Sanke demonstration uses the same approximation but applies it to a different 59-liter keg. Use its weight method, not its fixed target.
For example:
- T = measured setup tare in kilograms
- V = intended beer volume in liters
A provisional target is:
T + approximately V kilograms
If the beverage’s actual density is known, calculate its mass from that density instead.
Do not copy the final scale reading from another brewer’s demonstration. A target used for a different keg does not account for your keg’s empty mass, attached equipment, intended volume, or required headspace.
The nominal U.S. half-barrel capacity is a maximum, not an instruction to add exactly that amount. Select a target below the verified maximum liquid capacity so that a small gas headspace remains. The evidence does not establish one universal headspace volume for every keg, so use the keg manufacturer’s requirement where available.
Headspace provides a gas cushion. Filling to the brim leaves less room for temperature-related liquid expansion and pressure change and increases the chance that beer will enter gas-side hardware.
If beer unexpectedly appears at the gas vent:
- Stop the transfer.
- Isolate the beverage path.
- Isolate the receiving-gas path.
- Isolate the gas source according to its instructions.
- Treat affected gas-side components as contaminated.
- Clean, inspect, and restore them under their manufacturers’ procedures.
Do not continue simply because the expected scale target has not been reached.
After filling: leak checks, carbonation, chilling, and serving
Confirm shutdown before moving to carbonation or service:
- Both coupler paths have been isolated.
- The coupler has been removed correctly.
- The valve area has been rinsed and sanitized.
- A sanitary cap has been fitted.
- No beer is visible in the gas-side hardware.
- The final scale reading has been recorded.
Before leaving the keg connected to gas or dispensing equipment, assemble and leak-test the system according to the manufacturers’ instructions. Use a compatible leak-detection solution on the designated connections and seals. Persistent bubbles indicate a connection that requires correction before the system remains pressurized.
What happens next depends on the beer’s condition.
If the beer was already cold and carbonated
A gentle transfer that maintained pressure may preserve enough carbonation that immediate CO2 adjustment is unnecessary. Let the keg stabilize at its intended serving temperature, then assess the pour.
If carbonation is low, adjust it using the beer’s temperature and desired CO2 level. If it is high, do not assume that lowering regulator pressure immediately removes dissolved gas; follow an equipment-appropriate stabilization or correction process.
If the beer is uncarbonated or undercarbonated
Chill the keg, connect regulated CO2, and select pressure from a temperature-versus-CO2 chart for the desired carbonation level. Colder beer absorbs CO2 more readily, so beer temperature, headspace pressure, and the desired dissolved CO2 must be considered together.
Do not use one pressure simply because it appeared in a transfer, force-carbonation, set-and-forget, or serving example. Those procedures have different objectives. General Cornelius-keg guidance likewise recommends selecting carbonation pressure from beer temperature and desired CO2 while remaining below the keg’s marked working pressure. Use temperature-based carbonation guidance rather than a universal PSI.
During serving, gas enters through the coupler’s gas path and pressure pushes beer up the spear into the beverage line. Leaks waste CO2 and can interfere with carbonation and dispensing.
A concise post-fill sequence is:
- Cap the valve or connect sanitized dispensing equipment.
- Leak-test the assembled gas connections.
- Chill the keg to a stable temperature.
- Select carbonation from a temperature-based chart.
- Allow the beer to stabilize.
- Test carbonation and pour quality.
- Adjust the serving system separately.
- Remain within every marked working-pressure limit.
If your half-barrel has a removable lid, use the Cornelius-style workflow instead
Capacity and exterior dimensions do not determine the workflow; hardware does. If your large keg has a removable oval lid and separate gas and liquid posts, do not use Sanke coupler instructions.
Removable-lid workflow only
The steps in this section do not apply to a conventional sealed Sanke keg.
First isolate the gas and fully depressurize the keg using its manufacturer-approved method. Only then open it.
Inspect the shell, lid, pressure-relief feature, posts, dip tubes, poppets, seals, and O-rings. Clean the keg and removable parts, then sanitize all beer-contact surfaces according to the product instructions.
Reassemble the keg, prepare it with CO2, and leak-test the lid, posts, relief feature, and gas connections. Removable lids and separate posts generally make these vessels easier for home users to inspect, clean, fill, and maintain than sealed Sanke kegs.
Beer can be introduced in one of two ways, depending on the source and keg design.
Closed transfer through the liquid post
Connect a sanitized transfer line to the liquid post so beer travels down the long dip tube. Keep receiving pressure below source pressure and provide a controlled exit for displaced gas through the gas side.
Monitor the fill by weight. Stop before beer can enter the gas dip tube or gas line.
Open-lid siphon transfer
For beer in an unpressurized bucket or carboy:
- Fully depressurize the keg.
- Open it according to its instructions.
- Extend sanitized tubing near the bottom.
- Transfer gently to reduce splashing.
- Remove the tubing without contacting unsanitized surfaces.
- Fit the sanitized lid and gasket.
- Pressurize within the marked limit.
- Check the lid and connections for leaks.
- Purge the headspace using the manufacturer-approved process.
- Chill and carbonate as required.
The American Homebrewers Association describes Cornelius kegs as removable-lid vessels with separate gas and liquid connections, food-grade tubing, regulators, and serviceable O-rings. Those access and maintenance instructions are configuration-specific and must not be applied to a Sanke valve.
For a hybrid keg, use the manufacturer’s instructions. Do not assume that removable access makes every Sanke-side procedure identical to an ordinary Cornelius workflow.
Troubleshoot no flow, foaming, leaks, and liquid in the gas path
No flow at all
Check in a controlled order:
- Does the coupler match the valve?
- Is it fully and correctly engaged?
- Is the documented beverage path open?
- Is the source outlet open?
- Is source pressure safely above receiving pressure?
- Does displaced gas have the required controlled exit?
- Are hoses kinked or blocked?
- Do coupler checks prevent reverse flow?
- Was any permitted check removal completed under the exact coupler instructions?
Do not increase pressure to overcome an unidentified blockage. Isolate the system under the documented procedure, identify the restriction, and correct it before resuming.
The transfer starts and then stops
Receiving pressure may have equalized with source pressure. Confirm that the controlled vent remains in the required position and is unobstructed.
Also check the source. Use only the arrangement approved for that vessel.
Excessive foam develops
Slow or stop the transfer. Reduce the pressure differential using the documented controls and avoid aggressive venting. A rapid receiving-pressure reduction can cause dissolved CO2 to leave carbonated beer.
Check beer temperature and make small control changes rather than repeatedly opening and closing the vent in large movements.
A gas connection leaks
Stop the transfer and isolate pressure according to the equipment instructions. Do not disassemble a pressurized connection.
After approved depressurization, inspect:
- Gaskets and O-rings
- Hose seating and clamps
- Thread compatibility
- Coupler seals
- Regulator and shutoff connections
- Sealing surfaces
Reassemble correctly and repeat the approved leak test before resuming. Northern Brewer’s kegging instructions use persistent bubbles to identify gas-side leaks, although its disassembly procedure applies to removable-lid kegs rather than Sanke hardware. Apply the leak-test principle without transferring Cornelius service steps to a Sanke.
Beer appears in the gas line or vent
Stop immediately:
- Isolate the beverage path.
- Isolate the gas path.
- Isolate the regulator or gas source.
- Do not resume until the liquid route has been identified.
- Clean and sanitize affected beer-contact parts.
- Service gas-side equipment according to its manufacturer’s instructions.
- Inspect or replace applicable backflow components as directed.
Do not merely drain the visible hose and continue.
The target weight arrives too soon
Stop and verify:
- The recorded tare
- Whether the coupler and platform were included
- Whether more hose is now resting on the scale
- Whether a hose is pulling on the platform
- Whether the scale changed units or reset
- The keg’s actual capacity
- The intended beer-mass calculation
Do not continue simply because the nominal maximum volume has not been transferred. The actual keg, measured tare, and selected below-capacity target govern the decision.
The valve, coupler, or spear seems damaged
Stop rather than improvising under pressure. A sticking valve, damaged coupler, questionable relief feature, or uncertain spear condition requires model-specific assessment.
Isolate the source and depressurize only through the approved procedure. Refer the equipment to its manufacturer, a qualified draft technician, or a keg-service provider.
Before another attempt, confirm:
- Correct keg valve and coupler
- Verified ownership
- Applicable equipment manuals
- Verified pressure limits
- Internally clean and sanitized keg
- Sanitized transfer path
- Coupler approved for reverse filling
- Documented receiving-gas control
- Recorded tare
- Below-capacity target weight
- Required backflow controls
- Accessible isolation controls
- Ventilation and vent routing established under applicable guidance
Frequently asked questions
Does every 1/2-barrel keg use a Sanke D coupler?
No. Sanke D is common in North America, but keg capacity does not establish valve type. A full-size keg may use D-type, A-type, or another fitting.
Inspect the valve, identify the manufacturer where possible, and match the coupler before connecting anything. Do not force a D coupler onto a keg merely because it is described as a half-barrel.
Can I fill a Sanke keg without removing the spear?
Yes, if the exact keg and coupler support reverse filling. Beer enters through the coupler’s beverage side and travels down the spear while displaced gas exits through the controlled gas path.
Some dispensing couplers contain checks that block reverse flow. Follow the exact manufacturer’s instructions rather than removing parts generically. Spear removal is not part of this transfer method.
Can I siphon directly from an unpressurized bucket into a sealed Sanke keg?
Not by applying ordinary open-lid Cornelius instructions. A sealed Sanke has no removable lid through which to lower a siphon hose, and the supported Sanke procedure uses a suitable pressure-rated source vessel.
Use an approved intermediary vessel, purpose-designed transfer equipment, or a removable-lid keg. Do not remove the spear or pressurize an ordinary bucket to improvise the connection.
How much beer should I put in a 15.5-gallon half-barrel?
Use less than the verified maximum liquid capacity so that a small gas headspace remains. Determine the target from:
- The actual keg capacity
- The intended beer volume
- The measured setup tare
- The beer’s approximate or known density
- Any manufacturer-specified headspace requirement
Use:
Target scale reading = measured tare + intended beer mass
For rough planning, liters of beer can be treated as approximately equal to kilograms, but actual beverage density varies.
What PSI should I use to fill and carbonate the keg?
There is no universal PSI.
For transfer, the pressure-rated source must remain modestly above the receiving keg while displaced gas leaves through the approved controlled path. Use only the pressure differential permitted by the complete setup.
For carbonation, select pressure from the beer’s stable temperature and desired CO2 level. For serving, balance pressure with temperature, carbonation, beverage-line resistance, and the faucet arrangement.
A pressure taken from another fermenter, keg, force-carbonation method, or serving system may be inappropriate for yours.
Final go-or-stop checklist
Proceed only if:
- The keg is yours or you have authorization to use it.
- The valve and coupler are positively identified.
- The keg’s internal cleaning and sanitation can be verified.
- The exact coupler is approved for reverse filling.
- The keg, fermenter, regulator, hoses, fittings, and valves are approved for the setup.
- Manufacturer instructions define the required pressure, venting, backflow, and isolation arrangements.
- The tare and below-capacity target are recorded.
- A controlled receiving-gas path is available.
- Applicable CO2 ventilation and vent-routing requirements have been established.
- Every shutdown control is immediately accessible.
Then transfer gently through the beverage path, vent displaced gas only as documented, monitor continuously by weight, preserve headspace, isolate both paths before disconnection, sanitize and cap the valve, leak-test the finished system, and select carbonation pressure from beer temperature and desired CO2.
If ownership, internal cleanliness, pressure limits, ventilation, reverse-flow authorization, or valve condition cannot be confirmed, stop. Use model-specific manufacturer documentation or qualified keg service rather than improvising.