
Glycol Chiller vs Fermentation Chamber
Glycol fits better when two or more batches need independent schedules, a conical cannot pass through an appliance door, or a cold crash overlaps fermentation.
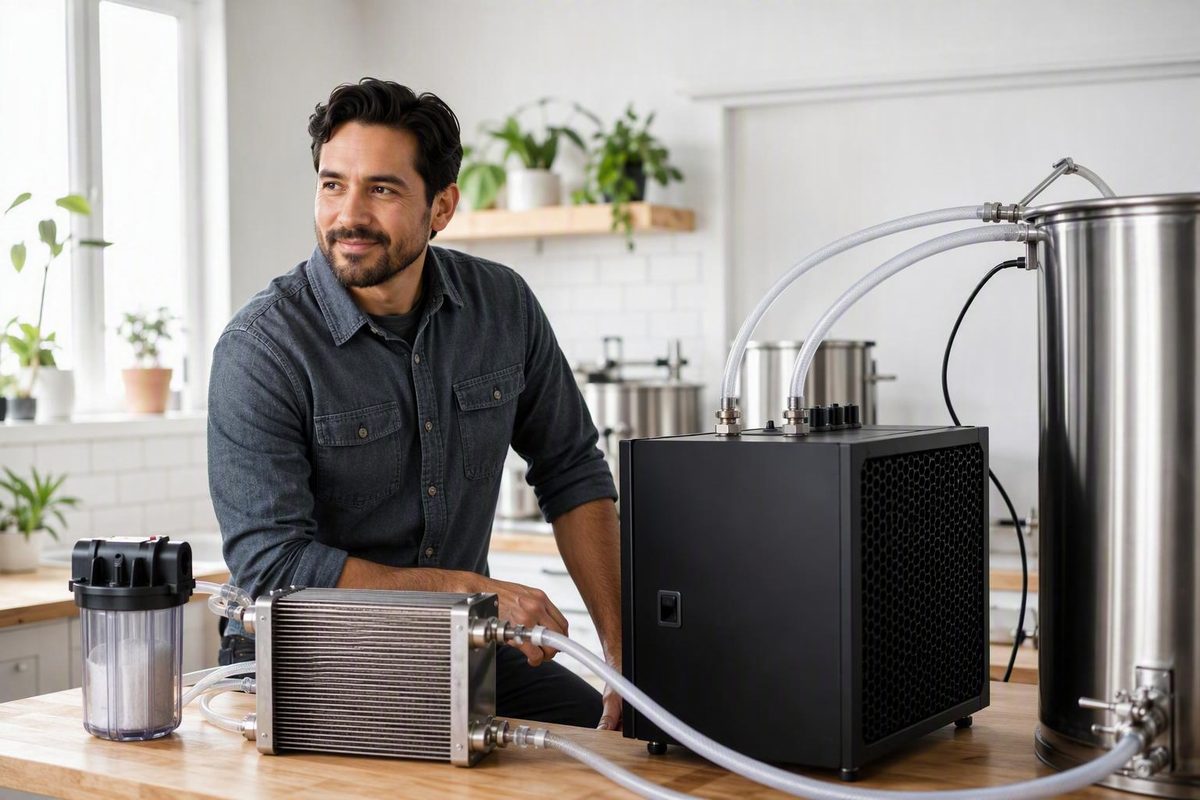
By Erik Sandoval, homebrewer and water-treatment technician Prices and specifications checked August 17, 2026
Disclosure: The products in this guide were not independently tested. Prices, specifications, bundles, and capacity claims were checked against the cited manufacturer and retailer listings.
A glycol chiller can provide independent temperature control for several fermenters, including batches fermenting, lagering, holding cold, or cold crashing on different schedules. That flexibility does not make glycol the right choice for every brewery.
For one fermenter that fits comfortably inside a refrigerator or freezer, a fermentation chamber is often simpler and less complex. Glycol becomes more persuasive when vessels are too large for a chamber, several batches need separate temperature zones, or moving full fermenters is impractical.
The correct choice depends on simultaneous cooling demand, vessel compatibility, ambient temperature, insulation, controls, plumbing, and complete installed cost. Compressor horsepower or an advertised fermenter count cannot answer those questions by itself.
What a glycol chiller does—and what it does not do
A glycol chiller is a refrigeration system that cools a water-glycol solution held in a reservoir. A pump circulates that coolant through a fermenter jacket, internal coil, or cooling rod, where it absorbs heat before returning to the reservoir.
There are two connected heat-transfer loops:
- The refrigeration loop: A compressor, condenser, metering component, and evaporator move heat out of the coolant. The evaporator cools the reservoir or a heat exchanger, while the condenser releases the captured heat into the surrounding environment.
- The coolant loop: A pump sends chilled water-glycol solution to the fermenter. The coolant absorbs heat through the vessel wall or cooling surface and returns warmer to the reservoir for rechilling.
The coolant normally remains physically separate from the beer. That separation depends on an intact jacket or coil and leak-free connections; the beer itself is not supposed to circulate through the chiller.
Common brewing applications include:
- Controlling heat produced during active fermentation
- Fermenting different batches at different temperatures
- Lagering or conditioning
- Holding finished beer cold
- Cold crashing before transfer or packaging
These processes do not create equal loads. Maintaining beer near an established fermentation temperature usually requires less cooling than quickly pulling a full vessel down to cold-crash temperature. During active fermentation, the system must remove ambient heat gain and heat generated by fermentation. During a cold crash, it must also remove stored heat from the beer and vessel within the requested pull-down time.
A reservoir buffers short changes in load and may reduce rapid compressor cycling. It does not replace sufficient refrigeration capacity.
A fermentation chiller should also be distinguished from equipment used for the main post-boil wort-cooling step. Hot wort presents a much larger temperature difference and thermal load. Unless the manufacturer explicitly approves hot-side service, use an immersion, counterflow, or plate chiller for the initial reduction.
Product limits matter. Penguin states that its 1/3 HP unit must not be used to cool wort directly from boiling and that returning coolant must not exceed 100°F on the manufacturer’s product page. Glycol may be suitable for a final temperature adjustment only when the system’s capacity, return-temperature limit, sanitation design, and other instructions permit it.
Glycol chiller versus refrigerator or fermentation chamber
A refrigerator, upright freezer, or chest freezer controls temperature by cooling the air around the entire fermenter. A glycol system cools through a vessel jacket, coil, or rod. Neither method is inherently more efficient, accurate, or stable in every installation; the available evidence does not provide controlled comparative measurements supporting such a universal claim.
Use this matrix to identify the more practical fit:
| Decision factor | Refrigerator or fermentation chamber | Glycol chiller |
|---|---|---|
| Number of fermenters | Strong fit for one vessel; more vessels may require more chambers | Increasingly useful for two or more vessels |
| Temperature zones | Usually one air-temperature zone per chamber | Separate zones are possible when each vessel has independently controlled coolant flow |
| Vessel dimensions | Fermenter must fit through the opening and inside the chamber | Useful for large or fixed conicals with compatible jackets or coils |
| Loaded weight | The full vessel may need to be lifted into or out of the chamber | Can reduce the need to move a full fermenter |
| Floor space | Requires an enclosure large enough for the vessel | Chiller is separate, but tubing and service clearance need space |
| Acquisition cost | Often lower when a suitable appliance is available | Usually higher after coolant, pumps, controls, coils, and plumbing |
| Complexity | Relatively simple appliance-and-controller arrangement | Adds pumps, hoses, fittings, controls, condensation, and leak points |
| Expansion | Another temperature may require another chamber | A correctly sized system may accept additional zones |
| Mixed schedules | Awkward when vessels require different temperatures | Suited to fermenting one batch while holding or crashing another |
| Vessel compatibility | Most vessels work if they physically fit | Requires a compatible jacket, coil, rod, or approved cooling interface |
For a chamber, measure more than the main fermenter body. Check:
- Maximum diameter, including handles and fittings
- Overall height with the airlock, blow-off connection, pressure hardware, or dry-hop equipment
- Door-opening dimensions, not only the appliance’s interior
- Compressor humps, shelves, baskets, and door liners
- A route for controller-probe wiring
- Space for a heater if the chamber will provide heating and cooling
- Floor or shelf capacity for the loaded vessel
- Whether the full fermenter can be loaded, cleaned, and removed safely
A chamber is generally the lower-complexity answer when one compatible fermenter fits and one temperature zone is sufficient. It encloses the vessel and avoids coolant plumbing, vessel pumps, and cooling-jacket requirements.
Glycol becomes more attractive when two or more batches need independent schedules, a conical cannot pass through an appliance door, or one vessel needs to cold crash while another remains at fermentation temperature. It can also solve a handling problem because the fermenter can remain in place while supply and return hoses connect it to the chiller.
The tradeoff is more hardware and maintenance. A glycol system introduces coolant, pumps, fittings, controls, condensation, and potential leaks. Internal coils or vessel jackets must also be inspected and maintained appropriately. These practical considerations—fit, lifting, cost, batch count, and complexity—are reflected in this community comparison of glycol systems and fermentation chambers.
A useful scenario-level rule is:
- One fermenter that fits: Favor a chamber unless expansion, handling, or an existing jacketed vessel justifies glycol.
- Two or more independently scheduled fermenters: Glycol becomes increasingly useful.
- One oversized or permanently positioned conical: Glycol may be practical even for one batch.
- Frequent mixed fermentation and cold-crash schedules: Favor a properly sized multi-zone system.
- Uncertain expansion plans: Compare a larger chiller’s installed cost with the cost and space needed for additional chambers.
How to size a glycol chiller for the real cooling load
Size a glycol chiller from the greatest realistic simultaneous cooling demand, not compressor horsepower or a generic maximum-tank count.
Start with one worksheet row per vessel:
| Input | What to record |
|---|---|
| Vessel | Name or number of each fermenter |
| Liquid volume | Actual batch volume, not nominal vessel capacity |
| Current temperature | Expected temperature when cooling begins |
| Target temperature | Lowest required beer temperature |
| Pull-down time | How quickly the target must be reached |
| Process mode | Fermenting, lagering, holding cold, or cold crashing |
| Ambient temperature | Realistic hottest room temperature |
| Vessel insulation | Type, coverage, thickness, and exposed fittings |
| Tubing | Length, diameter, insulation, and elevation change |
| Cooling surface | Jacket, internal coil, rod, or other approved interface |
| Concurrency | Which vessels may call for cooling together |
Do not treat process modes as equivalent. A model may maintain fermentation temperature in several small vessels but support fewer vessels during cold crashing. Lagering and cold holding may fall between those conditions depending on the target temperature, ambient heat gain, and whether the beer has already reached its target.
Build a realistic worst-case operating schedule, such as:
- Vessel A is cold crashing.
- Vessel B is already cold and must remain there.
- Vessels C and D are actively fermenting.
- The room is at its expected seasonal maximum.
- Vessels and coolant lines have their normal installed insulation.
When a manufacturer supplies reliable, model-specific load estimates, enter the estimate for each concurrent task and add them:
| Concurrent vessel | Operating mode | Manufacturer’s applicable load estimate |
|---|---|---|
| A | Cold crashing | A BTU/hr |
| B | Holding cold | B BTU/hr |
| C | Active fermentation | C BTU/hr |
| D | Active fermentation | D BTU/hr |
| Required concurrent capacity | A + B + C + D BTU/hr |
Use figures that match your vessel volume, ambient conditions, insulation, target temperature, and pull-down assumptions. Do not combine unrelated ratings or substitute another manufacturer’s estimate without confirmation.
A useful numerical boundary appears in Penguin’s sizing material: its table lists approximately 2,600 BTU/hr for cold crashing a 2 BBL vessel, while the 1/3 HP model is rated at 2,000 BTU/hr at 28°F. Under those stated estimates, that model would not cover even the cold-crash task before adding any concurrent fermentation or holding load. Penguin therefore advises adding the loads expected to occur together and moving to a larger model for hotter environments or uninsulated tanks on its brewing sizing guide.
Cooling demand rises when:
- The room is hotter
- A vessel or coolant line is poorly insulated
- Beer volume increases
- The starting-to-target temperature drop grows
- The requested pull-down time becomes shorter
- More vessels call for cooling simultaneously
Advertised vessel counts are conditional. Blichmann qualifies its figures for insulated vessels at a 75°F ambient temperature on its manufacturer listing. Penguin uses approximately 80°F ambient conditions and neoprene-or-better vessel insulation. MoreBeer’s examples use 75°F ambient conditions, neoprene insulation, and a 38°F cold-crash target, and its sizing guide advises allowing more capacity for hotter spaces or concurrent cold crashing.
Those differing assumptions are why two products advertised for the same number of tanks cannot be assumed to provide equivalent performance.
Choose additional capacity when the installation will face high ambient temperatures, bare stainless vessels, lengthy tubing, aggressive pull-down targets, or frequent overlapping cold crashes. The available evidence does not support one universal oversizing percentage.
Compare the correct specifications
Four commonly quoted specifications answer different questions:
-
BTU/hr: The rate at which the chiller can remove heat under stated rating conditions.
-
Reservoir volume: The available coolant volume and thermal buffer.
- Control-zone count: The number of separately regulated circuits supported or included.
BTU/hr is useful only when the rating conditions are stated. A capacity measured at 28°F coolant should not be treated as directly equivalent to an unqualified BTU figure or a rating measured at a warmer temperature.
Likewise, four included controllers do not prove that a chiller can cold crash four full tanks simultaneously. A higher-capacity unit without vessel pumps or controllers may provide no independent zones until accessories are installed.
For a borderline or unusual application, send the manufacturer:
- Actual liquid volume in every vessel
- Starting and target temperatures
- Required pull-down time
- Maximum ambient temperature
- Vessel and tubing insulation details
- Jacket or coil specifications
- Tubing length and elevation
- The worst realistic simultaneous schedule
Ask for written confirmation of the model, coolant concentration, pump requirements, and supported load.
Specification comparison of small brewing chillers
The table compares listed specifications, not independently measured performance. Manufacturers and retailers use different rating conditions, bundles, and vessel-capacity definitions.
| Model and attribution | Listed price | Cooling capacity | Compressor | Reservoir | Included pumps and controllers | Maximum advertised zones | Electrical | Dimensions and weight | Published sound | Important qualifications |
|---|---|---|---|---|---|---|---|---|---|---|
| BrewBuilt IceMaster Max 2—MoreBeer retailer listing | $799.99 | 1,700 BTU; rating temperature not stated | 3/8 HP | 4.5 gal | Two pumps and two controllers | Two | 110V | 19 × 12 × 17.5 in. | Not listed | Performance depends on insulation, ambient temperature, target, and process; vessel-side connection hardware may be additional |
| BrewBuilt IceMaster Max 4—MoreBeer retailer listing | $1,199.99 | 2,600 BTU; rating temperature not stated | 3/8 HP | 8 gal | Four pumps and four controllers | Four | 110V, 3.6A | 16.1 × 16.1 × 26 in. | Not listed | Advertised tank counts assume stated insulation, ambient conditions, and process |
| Penguin 1/3 HP—manufacturer-listed | $1,199.99 | 2,000 BTU/hr at 28°F | 1/3 HP | 1.25 gal | Reservoir controller included; vessel pumps and controls depend on configuration | Up to four under qualified assumptions | 110–120V, single phase; 3.9A; 450W | 16.25 × 18 × 12.5 in.; 41 lb | 56 dBA | Assumes roughly 80°F ambient and neoprene-or-better insulation; not outdoor rated; return coolant limited to 100°F |
| Blichmann 1/2 HP—manufacturer-listed | Estimated base total $1,399 | 3,100 BTU/hr at 28°F; 3,400 BTU/hr at 34°F | 1/2 HP | Not stated in supplied evidence | Pump-controller kits optional | Up to six optional kits | 110 VAC, 60 Hz; less than 500W | 16 × 17 × 29 in. | Not listed | Glycol and zone kits add cost; vessel counts assume insulated tanks at 75°F ambient |
| Grainfather GC4—Northern Brewer retailer listing | $1,149.99 | BTU/hr not listed; stated minimum is 40°F for six gallons | Not listed | 1.5 gal | Listed package includes connection components; additional conicals require extra kits | Up to four compatible Grainfather conicals | 300W; 110–120V, 60 Hz | 15.4 × 17 × 25.8 in.; 62 lb | Not listed | Ecosystem-specific compatibility; glycol and added connection kits sold separately; freight and shipping restrictions apply |
There is no defensible universal winner. The meaningful differences are architectural:
- IceMaster Max 2 and Max 4 packages include pumps and vessel controllers.
- Penguin states capacity at a 28°F rating condition but may require vessel-side pumps and controls.
- Blichmann states capacities at 28°F and 34°F and accepts several optional control kits; those kits are not part of the base estimate.
- Grainfather emphasizes integration with compatible Grainfather conicals and lists a 40°F minimum cooling temperature for six gallons.
Do not characterize one BTU figure as superior when another model’s rating temperature is unstated. Compare ratings only under compatible conditions, then evaluate included controls, reservoir arrangement, vessel compatibility, footprint, and installed cost separately.
Prices, refrigerants, bundles, freight terms, shipping restrictions, and availability can change. Recheck and date-stamp the comparison again immediately before publication or purchase.
Calculate the complete installed cost and control architecture
Sticker price is only the beginning. Build a bill of materials for the complete working system:
- Chiller
- Manufacturer-approved inhibited propylene glycol
- Water of the type specified by the equipment or coolant manufacturer
- Circulation pumps
- Vessel temperature controllers
- Compatible jackets, internal coils, or cooling rods
- Supply and return tubing
- Tubing insulation
- Barbed, threaded, or sanitary fittings
- Approved hose clamps or retainers
- Quick disconnects
- Vessel-specific connection kits
- Check valves, solenoid valves, or isolation hardware where required
- Reservoir and vessel probes
- Condensation trays, drainage, or floor protection
- Appropriate electrical receptacles and circuit capacity
- Freight, lift-gate, or restricted-delivery charges
- Spare coolant and common service parts
Each vessel normally requires two coolant paths: a supply line from the chiller to the cooling surface and a return line to the reservoir. Multiply tubing, insulation, fittings, and disconnects accordingly.
Dedicated pump per vessel
A dedicated-pump layout gives each fermenter its own pump and controller:
- The vessel probe measures beer temperature.
- The controller calls for cooling.
- The dedicated pump starts.
- Coolant passes through that vessel’s jacket or coil.
- The pump stops when the controller is satisfied.
This is straightforward for a small number of tanks and makes each circuit relatively easy to understand and isolate. The reservoir must have suitable space and connections for all pumps and returns.
Shared circulating loop with zone valves
A shared-loop architecture continuously circulates coolant through a main supply and return. Each fermenter branch uses an independently controlled solenoid or zone valve.
This can reduce the number of vessel pumps, but it requires more hydraulic planning.
A shared reservoir does not create independent temperature control by itself. Each fermenter becomes a separate zone only when coolant flow through that vessel can be started and stopped in response to its own beer-temperature probe.
Bundle contents therefore matter. IceMaster Max 2 and Max 4 listings include a pump-controller pair for each advertised zone. Blichmann’s kits are optional. Penguin installations may require vessel pumps and loop controls, while additional Grainfather conicals require connection kits.
Blichmann illustrates how quickly the base price can understate the system cost. In addition to the estimated $1,399 base total, its listing shows a pump-controller kit at $130.99 and a required 2.5-gallon propylene-glycol product at $141.99. That produces a documented subtotal of $1,671.98 for the chiller, one control kit, and glycol, before vessel hardware, tubing, fittings, insulation, freight, or additional zones.
Compare installed cost per usable control zone, not base price divided by the maximum advertised tank count. A zone is usable only when the chiller has enough capacity for the schedule and the installation includes the necessary controller, probe, pump or valve, cooling surface, and plumbing.
Plan for unintended flow as well. One reported homebrew arrangement used a return-line vacuum break, but that individual modification is not a universal remedy. Appropriate isolation, check valves, solenoids, routing, and manufacturer-approved hydraulic measures are the broader design tools.
Choosing coolant concentration and reservoir temperature
Use only the glycol chemistry, grade, inhibitor package, and concentration approved by both the chiller and coolant manufacturers.
Beverage-related installations commonly use inhibited propylene glycol formulated for suitable food-use equipment. “Propylene glycol” alone is not a complete specification because additives, inhibitors, materials compatibility, and intended use matter.
There is no universal mixing ratio
MoreBeer’s materials are internally inconsistent: general guidance gives a nominal 30% mixture, while some IceMaster summaries recommend 20%. Penguin recommends 35%–40% glycol for brewing near a 28°F reservoir temperature. Those differences should not be averaged into a new recipe.
The appropriate concentration depends on:
- The glycol product and inhibitor package
- Lowest expected coolant temperature
- Required freeze protection
- Chiller manufacturer limits
- Metals, seals, hoses, and other wetted materials
- Operating environment
Too little glycol may provide inadequate freeze protection. Excessive glycol can reduce heat-transfer performance. Select the concentration from the target coolant temperature and the specific product’s freeze-protection documentation, following the chiller manufacturer when its requirements are more restrictive. MoreBeer’s nominal 30% guidance and discussion of higher concentrations for some subfreezing operation appear in its retailer-produced glycol guide cited above.
Do not rely indefinitely on the original mixing volumes. Water or coolant may be lost or added during spills, repairs, and top-offs.
Set the reservoir only as cold as necessary
Product guidance often falls in the upper 20s Fahrenheit, but these are model-specific limits rather than a universal set point. IceMaster Max 2 and Max 4 listings warn against settings below 28°F, while Penguin recommends its specified brewing mixture for operation near 28°F.
An expert rule of thumb is to keep the coolant approximately 6°F colder than the lowest desired beer temperature. That is guidance, not a requirement. The necessary difference depends on cooling-surface area, coolant flow, insulation, load, and controller behavior, as explained in Brew Your Own’s technical discussion of coolant temperature and localized freezing.
Colder coolant is not automatically better. It can:
-
Increase ambient heat gain into tubing and the reservoir
-
Promote ice formation when freeze protection is inadequate
- Increase beer-temperature overshoot after a pump stops
- Raise the risk of localized freezing beside the cooling surface
- Make controller behavior more difficult to tune
Average beer temperature does not reveal every local condition. A probe in warm headspace may call continuously for cooling. A probe positioned poorly relative to a jacket or coil may fail to detect colder beer elsewhere in the vessel. Stratification, cooling-surface position, flow, controller differential, and cooling-call duration can all contribute to overshoot or localized freezing.
Place the vessel probe where it meaningfully measures the liquid, using a compatible thermowell or another manufacturer-approved method. Observe actual behavior during commissioning rather than assuming that the reservoir setting alone guarantees safe control.
Installation and commissioning checklist
Begin with the manual for the exact model. Confirm:
- Required voltage, frequency, amperage, and circuit arrangement
- Grounding and receptacle requirements
- Operating ambient-temperature range
- Minimum ventilation and service clearances
- Indoor, outdoor, or damp-location rating
- Acceptable coolant type and concentration
- Reservoir fill level
- Pump and tubing requirements
- Maximum return-coolant temperature
- Approved vessel interfaces
A chiller does not make heat disappear. Its condenser rejects the heat removed from the vessels, together with heat associated with the refrigeration and circulation system, into the surrounding space. An indoor installation therefore needs adequate airflow and can warm a small room, closet, or cabinet. Do not enclose a unit merely to reduce noise without preserving its required intake and exhaust clearances.
Install a chiller outdoors only when the exact model is explicitly rated for that placement and all environmental limits can be maintained. Penguin’s 1/3 HP model, for example, is listed as not outdoor rated.
Connection sequence
- Confirm vessel compatibility. Verify that the jacket, coil, rod, ports, seals, and fittings are approved for the coolant and operating conditions.
- Plan supply and return routes. Avoid sharp bends, crush points, hot surfaces, and exposed areas likely to suffer physical damage.
- Install fittings and clamps. Use the correct sizes and approved connection method.
- Insulate cold tubing. Seal insulation joints where practical to limit humid-air contact with cold lines.
- Add suitable quick disconnects. Position them to reduce spills and avoid excessive leverage on vessel ports.
- Provide condensation control. Protect floors, walls, electrical connections, shelves, and nearby equipment.
Commissioning sequence
Before connecting a valuable batch:
- Prepare the manufacturer-approved coolant mixture.
- Fill the chiller reservoir with that approved mixture to the specified level.
- Purge or manage trapped air as directed.
- Run each circuit individually.
- Leak-test every fitting, jacket, coil, pump, and hose.
- Confirm visible or measurable return flow from every zone.
- Turn each zone off and verify that circulation stops.
- Cross-check the reservoir probe against a suitable reference.
- Cross-check each vessel probe.
- Confirm that the vessel probe measures liquid rather than headspace.
- Observe controller cycling and temperature overshoot.
- Fill the fermenter or test vessel with water or another approved, nonvaluable commissioning load; do not replace the reservoir’s required coolant mixture with plain water unless the manufacturer directs it.
- Conduct an extended run while monitoring condenser airflow, room temperature, reservoir level, leaks, and condensation.
Respect all stated thermal limits. For the Penguin example, return coolant must remain at or below 100°F, and the unit must not be used to cool wort directly from boiling.
Treat condensation as part of the installation rather than an afterthought. Insulate vessels and cold tubing without obstructing chiller ventilation. Route moisture away from plugs, controllers, extension connections, and water-sensitive surfaces.
Maintenance, troubleshooting, and the DIY decision
A glycol system combines refrigeration, coolant, pumps, hoses, controls, and vessel hardware. Regular inspection should cover all of them.
Recurring maintenance checklist
- Check reservoir level
- Inspect coolant color, clarity, and visible contamination
- Verify concentration by the approved method
- Look for drips, stains, damp insulation, or a falling coolant level
- Inspect tubing for hardening, swelling, abrasion, kinks, or cracking
- Check clamps, fittings, couplers, seals, and isolation devices
- Confirm pump operation
- Verify return flow through every zone
- Check pressure where the system is designed and instrumented for it
- Clean strainers or filters as specified
- Keep condenser coils and ventilation openings clean
- Inspect cords, plugs, and controller enclosures
- Clean the reservoir according to the manufacturer’s procedure
- Confirm that insulation remains dry and intact
Follow the equipment and coolant manufacturers’ testing, flushing, and replacement procedures rather than applying an unsupported universal replacement interval. These maintenance areas are also covered in a supplier’s brewery glycol-system maintenance overview.
Troubleshooting by symptom
| Symptom | Checks to make before assuming major refrigeration failure |
|---|---|
| Weak cooling | Simultaneous load, ambient temperature, vessel and tubing insulation, reservoir set point, concentration, coolant level, condenser airflow, pump operation, restrictions, leaks, and cooling-surface contact |
| Compressor runs for long periods | Excess load, hot room, dirty condenser, blocked ventilation, low reservoir level, poor insulation, warm return coolant, or unrealistic pull-down target |
| Little or no return flow | Pump power, trapped air, closed valve, kinked tubing, clogged coil, incorrect connection, elevation, restriction, low coolant level, or pump failure |
| Beer overshoots below set point | Reservoir too cold, probe position, controller differential, long pump run, residual flow, high-flow coil, or poor liquid mixing |
| Inactive vessel keeps cooling | Siphoning, suction from another pump, missing isolation, leaking solenoid, failed check valve, or unsuitable branch layout |
| Icing | Inadequate freeze protection, reservoir below the approved limit, restricted flow, cold spots, or moisture freezing on exposed components |
| Excess condensation | Missing or damaged insulation, exposed fittings, humid air, unnecessarily cold coolant, or absent drainage |
| Chiller or room overheats | Blocked condenser, insufficient clearance, enclosed installation, fan failure, high ambient temperature, or excessive load |
For overshoot or suspected localized freezing, examine the complete control chain: reservoir temperature, probe position, jacket or coil location, pump-flow duration, controller differential, stratification, and continued flow after the cooling call ends.
For unintended circulation, correct the hydraulic cause rather than copying a forum modification. Depending on the layout, the solution may involve routing changes, isolation valves, suitable check valves, controlled solenoids, or a manufacturer-approved anti-siphon measure.
Is a DIY glycol chiller sensible?
Documented DIY systems have used window air conditioners, insulated reservoirs, submersible pumps, external controllers, and fabricated cooling circuits. One published build used a 5,000 BTU window unit and a 17-quart cooler, but it was an individual project rather than a standardized capacity or reliability test.
DIY construction can offer a custom layout and replaceable off-the-shelf components. It can also involve consequential hazards. One documented project repositioned refrigerant tubing, bypassed the appliance thermostat, altered wiring and panels, and installed pumps and controls in a fabricated enclosure. Those modifications create safety boundaries involving mains electricity, refrigerant-containing tubing, moving components, sharp fabricated parts, and condensation near electrical equipment, as shown in the Underhill Brewing DIY project.
Restricted airflow is another serious design concern. In that individual build, inadequate enclosure ventilation caused the air-conditioner fan motor to overheat and melt its plastic mount before the builder added an exhaust fan and intake vent. The incident does not establish how frequently such failures occur, but it demonstrates why condenser and motor airflow cannot be improvised.
Another documented DIY design required electrical wiring, air-conditioner modification, fabrication, and refrigerant-line manipulation, and its author advised seeking professional help when the builder was not comfortable with electrical work. Such projects do not provide independently verified capacity, safety, energy-use, or long-term reliability data.
DIY should therefore be treated as a fabrication, serviceability, and safety decision—not merely as a cheaper way to acquire cooling. Anyone without appropriate electrical, appliance, fabrication, and refrigeration competence should choose packaged equipment or engage qualified professional help. Do not bend refrigerant lines, bypass safety controls, or improvise mains wiring solely from an online build.
Can a glycol chiller cool boiling wort?
Do not assume that it can. Small glycol chillers intended for fermentation generally have much less capacity than rapid post-boil cooling requires, and hot return coolant may exceed the equipment’s operating limit.
Use an immersion, counterflow, or plate chiller for the initial reduction unless the glycol system is explicitly rated for hot-side service. A two-stage process—tap water first, followed by colder water or an approved glycol stage—can reduce the load on the final cooling system.
Can one glycol chiller control several fermenters at different temperatures?
Yes, if coolant flow through each fermenter is regulated independently.
A small system may use one pump and controller per vessel. A shared-loop system may use a continuously operating main pump with independently controlled solenoid valves. Sharing a reservoir alone does not create separate temperature zones.
The chiller must also have enough refrigeration capacity for overlapping loads. Four available connections do not establish that the unit can cold crash four full vessels simultaneously.
What glycol-to-water ratio should I use?
Use the concentration specified for the exact chiller, coolant product, wetted materials, and minimum reservoir temperature. Published brewing guidance varies from approximately 20% to 40%, so there is no reliable universal ratio.
Choose the mixture from the coolant manufacturer’s freeze-protection data and verify it with the specified test method. Do not use ethylene glycol or unidentified automotive antifreeze in beverage-related equipment.
How cold should the glycol reservoir be?
Set the reservoir only as cold as necessary to reach the lowest required beer temperature while remaining within the chiller and coolant manufacturers’ limits.
A modest difference between coolant temperature and target beer temperature is generally easier to control than an unnecessarily cold bath. Watch for overshoot, icing, condensation, and localized freezing. Probe position, cooling-surface location, stratification, flow, and controller behavior can matter as much as the displayed reservoir temperature.
Is a glycol chiller worth buying for one fermenter?
Usually not when one fermenter fits safely inside a refrigerator or freezer and only one temperature zone is required. A chamber is generally simpler and avoids coolant plumbing, vessel pumps, and cooling-coil requirements.
A glycol chiller can still make sense for one fermenter when the vessel is too large for a chamber, cannot be moved safely while full, already has an integrated jacket, or is likely to become the first zone in a larger system.
Use this final selection sequence:
- Decide whether one fermenter can be handled more simply in a chamber.
- Map the worst realistic simultaneous fermentation, cold-holding, and cold-crash schedule.
- Compare BTU/hr only at stated rating conditions, then compare included control zones separately.
- Calculate complete installed cost, including coolant, pumps, controls, vessel hardware, plumbing, insulation, and freight.
- Verify capacity, coolant, placement, electrical, and pump requirements with the manufacturer.
A glycol chiller is a flexible multi-vessel tool, not an automatic upgrade for every brewer. Safe installation, adequate insulation, separate zone control, and realistic load planning matter as much as the chiller itself.