Skip to Content

Water, decided by numbers

Homebrew Filters
Home/Treatment Systems
Treatment Systems

Sand filter parts: A Practical Guide

Sand filter parts are the components that hold the filter media, route water, collect filtered water, seal connections, and let you control or monitor the…

Erik Sandoval · Published · 8 Min Read

Sand filter parts are the components that hold the filter media, route water, collect filtered water, seal connections, and let you control or monitor the system. For most shoppers, the phrase refers to swimming-pool sand filters, although similar terminology appears in potable-water, well-water, and industrial equipment. Before ordering anything, identify the system type, manufacturer, series, model, valve position, connection size, and tank diameter. Similar-looking parts are not necessarily interchangeable.

What sand filter parts means

A sand filter is an assembly rather than one replaceable item. Some parts control water flow, some support the filter media, and others keep the pressurized system sealed.

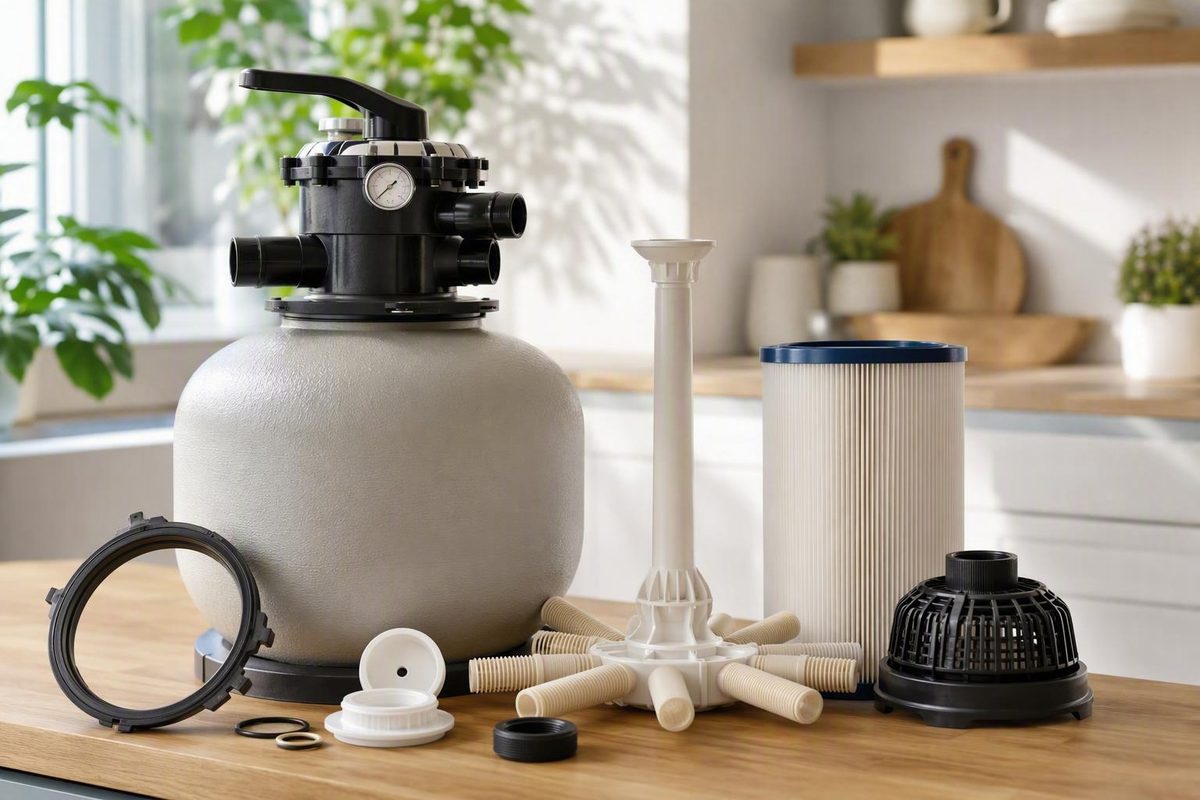
Common pool sand filter parts include:

  • Filter tank: The main vessel containing the filter media and internal components.
  • Multiport valve: Directs water through different operating paths. Depending on the filter, it may be mounted on top of the tank or beside it.
  • Valve handle and internal gasket: Let the user select a valve position and separate the internal flow paths.
  • Standpipe: Connects the internal collection assembly to the valve.
  • Laterals: Slotted or screened branches near the bottom of the tank that collect water while retaining the filter media.
  • Pressure gauge: Provides a system-pressure reading that can be compared with the filter’s normal operating condition.
  • Air-relief components: Allow trapped air to be released where the filter design includes a manual relief mechanism.
  • Tank clamp, collar, or flange: Secures major sections of the assembly.
  • O-rings and gaskets: Seal the valve, tank opening, unions, drain, and other connections.
  • Drain cap or drain assembly: Provides access for draining the tank.
  • Unions and adapters: Connect the filter to the pump, return plumbing, and waste line.

The exact component names and arrangement vary. A top-mounted valve, for example, should not be assumed to use the same body, standpipe connection, or seals as a side-mounted valve. The model’s parts diagram is more dependable than appearance alone.

How sand filter parts works

During normal filtration, the pump sends water into the valve. The valve routes that water into the tank, where it travels through the filter media. The internal collection assembly then carries the filtered water into the standpipe and back through the valve toward the return plumbing.

The same parts may form a different flow path when the valve is placed in another operating position. That is why valve compatibility involves more than fitting the tank opening: the ports, internal passages, connections, and standpipe arrangement must also match the filter.

Seals keep water inside the intended flow path. If an O-ring is displaced, worn, dirty, or incompatible, water may appear around a connection. If a valve’s internal gasket or related component is damaged, water may travel toward the wrong port. A leak’s location is therefore useful diagnostic information, but it does not identify the failed part with certainty.

The laterals and standpipe form another connected group. If filter media appears downstream, these internal components may need inspection, but media choice, filling technique, valve operation, or another installation issue can produce similar symptoms. Diagnose the system before buying a set of laterals based on the symptom alone.

The main approaches

The practical choice is usually between replacing a small service part, replacing a complete assembly, or replacing the filter.

Approach Best fit Main tradeoff
Replace a seal or fitting Leak is localized and the surrounding parts are sound Cheapest path, but only if the diagnosis is correct
Replace an internal component Inspection identifies a damaged lateral, standpipe, or related part May require removing filter media and opening the tank
Replace the valve assembly Valve damage is broader than one serviceable component Easier than rebuilding in some cases, but compatibility is critical
Replace the filter Tank integrity, parts availability, or total repair effort is unfavorable Higher initial cost but avoids stacking repairs onto a failing assembly

You will also need to compare original-equipment and aftermarket parts. An original-equipment part is often easier to verify against a manufacturer’s diagram. An aftermarket option may be less expensive or easier to obtain, but the seller should identify the exact compatible models rather than relying on broad phrases such as “fits most filters.”

A third choice is whether to buy one component or a kit. A seal kit can be sensible when several seals must be disturbed during service, but a larger kit is not automatically better. Extra pieces can create confusion if multiple versions are included without clear identification.

A practical process

Start with identification, not shopping.

  1. Define the filter type. Confirm whether you have a swimming-pool filter or a sand filter used for another application. Parts and service procedures do not transfer safely between unrelated systems.

  2. Photograph the equipment. Capture the complete installation, tank label, valve label, plumbing connections, pressure gauge, clamp, drain, and the area showing the symptom.

  3. Record identifying details. Write down the manufacturer, full model number, serial number, tank diameter, valve position, port size, and any number molded or printed on the existing part.

  4. Locate the exact manual and parts diagram. Match the model and, where relevant, the production version or model year. Use the diagram to confirm the component’s name, position, orientation, and part number.

  5. Localize the problem. Clean and dry the surrounding area, then observe where leakage or abnormal behavior begins. Water running down the tank can make a leak appear to originate below its actual source.

  6. Inspect before ordering when appropriate. Follow the model-specific shutdown and depressurization procedure before opening or loosening any filter component. Isolate electrical power to the pump, release system pressure, and confirm the filter is no longer pressurized. If the procedure is unclear, stop and use a qualified pool professional.

  7. Compare the complete specification. A matching brand name is not enough. Check model coverage, part number, dimensions, valve orientation, connection type, thread specification, and included seals or hardware.

  8. Check seller terms. Confirm availability, return conditions, warranty terms, and whether an older part number has been replaced by a newer one. Preserve the packaging until fit and operation have been confirmed.

  9. Reassemble according to the manual. Keep sealing surfaces clean, follow the specified orientation, and use only a seal lubricant approved for that model and seal material. Do not substitute general-purpose adhesives or sealants for a correctly fitted component.

  10. Test deliberately. Restore operation using the manufacturer’s startup procedure. Watch the serviced area and check that water follows the intended path before considering the repair complete.

Common mistakes and tradeoffs

The most common buying mistake is selecting a part by photograph. Two valves or laterals may look alike while differing in diameter, port arrangement, threads, or internal geometry. Treat photos as a preliminary check, not proof of compatibility.

Another mistake is diagnosing by symptom alone. Sand or other filter media in a pool may point toward an internal collection problem, but it does not prove that every lateral needs replacement. Likewise, moisture around the valve does not automatically mean the entire valve body has failed; the source could be a nearby seal, union, gauge, or connection.

Avoid treating every leak as a seal problem. Replacing an O-ring cannot correct a cracked mating surface, distorted component, damaged thread, or compromised tank. A suspected tank crack or structural defect is not a routine patching project; discontinue operation and obtain model-specific professional guidance.

There is also a repair-access tradeoff. A low-cost internal part may require substantial disassembly, removal of filter media, and careful reassembly. The part price alone therefore gives an incomplete picture. Consider labor, new media if required, seals disturbed during access, tool needs, downtime, and the possibility of discovering additional damage.

Finally, do not force a valve handle or loosen a clamp while the system is operating. Use the shutdown and pressure-release sequence for the exact equipment before service. If the gauge reading seems unreliable, do not use the gauge alone as proof that opening the filter is appropriate.

How to choose the next step

Choose the smallest repair that is both diagnostically justified and verifiably compatible.

A seal or drain component may be a reasonable next step when the leak is precisely localized, the surrounding surfaces are intact, and the exact replacement can be identified. An internal component is more appropriate when inspection reveals specific damage and the tank remains serviceable. A complete valve can make sense when several valve components are damaged or a supported assembly is easier to obtain than individual pieces.

Consider replacing the entire filter when the tank itself is compromised, essential parts cannot be verified or obtained, or the combined repair cost and effort approach the value of a suitable replacement. Age alone does not settle that decision; physical condition, parts support, installation requirements, and the extent of the failure matter more.

Your concrete next step is to photograph the model label and problem area, then find the exploded parts diagram for that exact model. Mark the suspected component on the diagram and verify its current part number before comparing prices.

What should a beginner know about sand filter parts?

Beginners should know that a sand filter is a model-specific assembly. The valve, tank, standpipe, laterals, gauge, drain, fittings, and seals work together, and a visual resemblance does not establish fit.

Begin with the model label and parts diagram. Do not start by searching for a generic “sand filter valve” or “sand filter O-ring.” Also distinguish ordinary service parts from structural components: replacing a seal is a different decision from addressing damage to the tank.

What are the main risks of sand filter parts?

The main risks are opening a system before it has been shut down and depressurized, buying an incompatible part, misdiagnosing the source of a leak, damaging threads or sealing surfaces during installation, and treating structural damage as a minor service issue.

Reduce those risks by using the exact manual, isolating pump power, following the specified pressure-release procedure, recording measurements, and checking every compatibility detail. Use professional service when the tank may be damaged, the electrical or plumbing work exceeds your experience, or the correct procedure cannot be confirmed.

How do you evaluate sand filter parts options?

Evaluate each option using four questions:

  1. Does the part number match the exact filter model and version?
  2. Do the dimensions, valve position, port size, threads, and connections match?
  3. Does the package include the seals and hardware required for the repair?
  4. Are the return terms acceptable if the listing proves inaccurate?

Then compare the total job rather than the component price alone. Include access difficulty, replacement media, additional seals, tools, downtime, and the condition of the rest of the filter. The best option is the one that resolves a confirmed fault without introducing uncertain compatibility or investing heavily in an unsound assembly.

About the Author

Erik is a water-treatment tech and homebrewer who owns more filter housings than kitchen cabinets.