
DIY Water Filter: A Bottle Build and Its Drinking-Water Limits
Build a sand-and-gravel bottle filter for a sediment demonstration, understand its limits, and choose a verified DIY setup for household drinking water.
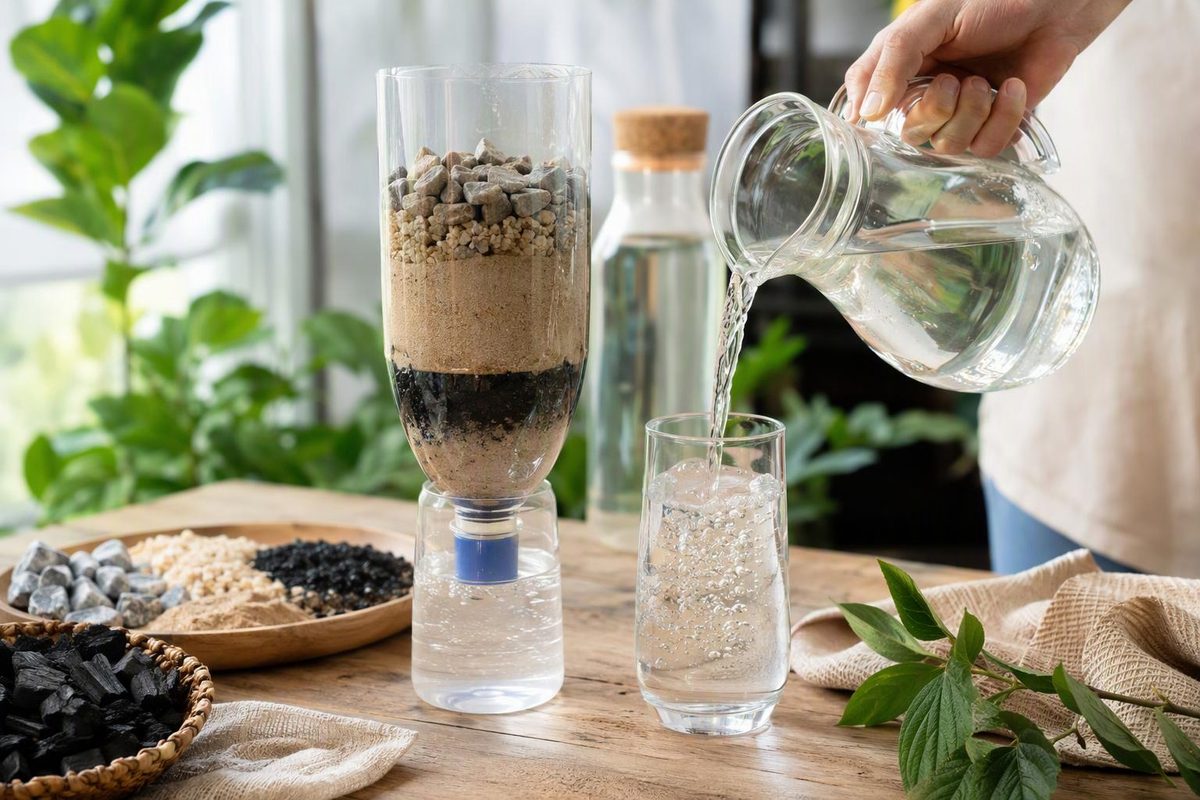
A DIY water filter made from sand, gravel and a coffee filter can demonstrate sediment removal. It does not make unknown water safe to drink. For everyday drinking water, the useful DIY route is installing or setting up a manufactured filter with verified claims for the problem you actually have—not improvising a treatment cartridge.
EPA’s bottle-filter lesson explicitly warns that its filtered water is unfit to drink. Clearer water is an observation, not a safety test.
Build a bottle filter for a sediment demonstration
This build adapts the filtration stage of EPA’s classroom activity. It is not the full municipal treatment process, and it is not a drinking-water recipe.
Materials
- One clean 2-liter plastic drink bottle, with its bottom cut off
- A stable collecting bowl or another bottle with its top cut off
- One paper coffee filter and a rubber band
- 1 cup washed, small, natural-color aquarium pebbles
- 1½ cups coarse sand
- 1½ cups fine sand
- At least 3 liters of clean tap water for rinsing
- A separate jar of tap water mixed with a little soil, for the demonstration
An adult should cut the bottle and handle its sharp edge. Do not use sewage, floodwater or water suspected of chemical contamination for this activity.
Assembly and use
- Remove the cap. Secure the coffee filter over the outside of the bottle neck with the rubber band.
- Invert and support the bottle. Stand it neck-down over the collecting vessel so it cannot tip.
- Add the pebbles first, followed by coarse sand, then fine sand. In the finished bottle, water enters through fine sand and leaves through the pebbles and paper filter.
- Rinse slowly. Pass at least 3 liters of clean tap water through the layers, pouring gently enough not to disturb the fine sand. Discard the rinse water.
- Let the soil-water mixture settle. Pour some of the upper water slowly through the filter without tipping the settled mud into it. Keep an untreated sample for comparison.
- Compare appearance and drainage time. Use the same volume for each trial—for example, 250 milliliters—and record how long it takes to drain. Do not taste either sample; discard the water after the activity.
The layer order, quantities and rinse volume follow EPA’s educational filter design. There is no drinking-water flow rating or replacement interval for this homemade build.
If sand appears in the collecting vessel, inspect the paper and its attachment. If drainage stalls, stop rather than squeezing the bottle or pressurizing it. A slower trickle does not prove better contaminant removal.
What to use for actual household water
Start with your utility’s water-quality report. If a concern may originate inside your home, or you use a private well, obtain relevant testing from a certified laboratory rather than choosing media by color or taste alone. EPA’s home-filtration guidance recommends using water-quality information to define the treatment goal.
| Your goal | Practical DIY route | What to verify |
|---|---|---|
| Reduce particles in otherwise safe water | Install a manufactured sediment-filter kit | Micron rating, housing compatibility and rated operating conditions |
| Improve chlorine taste or odor | Set up a certified pitcher, faucet or under-sink filter | The exact chlorine/taste-and-odor claim under NSF/ANSI 42 |
| Reduce lead or another measured health-related contaminant | Use a system certified for that specific reduction | The named contaminant claim, not merely an NSF logo |
| Reduce hardness and scale | Choose hardness treatment, not the bottle build | Softener performance; NSF/ANSI 44 covers hardness reduction |
NSF explains that certification does not mean a filter reduces every contaminant. Standard 53 covers health-related reduction claims, but you still need to check which contaminant the exact system is certified to reduce.
For a household installation:
- Use the system’s specified replacement cartridge; do not refill it with loose sand or charcoal.
- Follow its manual for connections, pressure and temperature limits, flushing and sanitation.
- Check connections for leaks before leaving the system unattended.
- Track treated volume and elapsed time, and replace filters according to the manufacturer’s instructions—not only when taste changes.
For cartridge comparisons, see nominal versus absolute micron ratings. For taste treatment, see what carbon water filters can and cannot do.
If this is an emergency, skip the bottle project
Use bottled water or follow local emergency instructions. EPA recommends letting cloudy water settle and filtering it through a clean cloth, paper towel or coffee filter before the required boiling or disinfection step. That preliminary filtering does not disinfect the water.
Boiling or disinfection addresses disease-causing microorganisms, but does not remove heavy metals, salts or most other chemicals. If chemical contamination is suspected, use an alternative safe supply rather than trying to repair the water with homemade media. Follow EPA’s emergency drinking-water guidance and the instructions issued for your local incident.