
Spin-Down Sediment Filter: Selection, Installation and Cleaning
Choose a spin-down sediment filter for sand and grit. Compare micron and mesh ratings, check flow limits, and plan installation, flushing and cleaning.
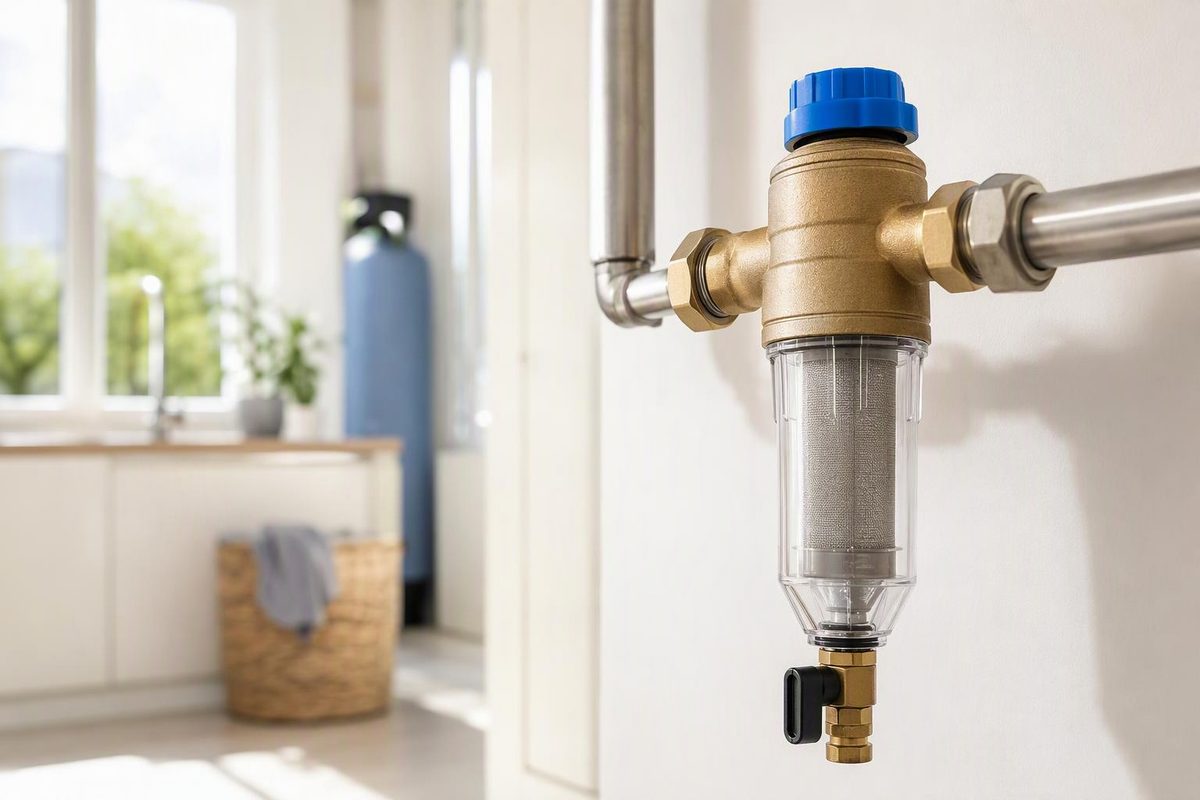
A spin-down sediment filter is a flushable, reusable screen prefilter for particles such as sand, grit and loose rust. Choose one when coarse sediment is loading up downstream filters or collecting in fixtures—and you have an accessible place to discharge the flushing water. Its main advantage is removing accumulated solids without replacing a cartridge each time.
It is not a complete drinking-water treatment system. Sediment filtration does not effectively remove dissolved contaminants and is not generally recommended for microbial treatment. Clearer water is not proof of safe water. University of Nebraska–Lincoln Extension explains these limits.
How the spin-down action works
In a conventional centrifugal spin-down design, incoming water swirls around a screen inside a clear bowl. Heavier particles move toward the bowl wall and settle below the main water current; water passes through the screen to the outlet. The screen catches additional particles, while a valve at the bottom lets you purge accumulated sediment under water pressure. This illustrated operating description shows the flow path.
The screen is stationary: “spin-down” describes the water movement, not a rotating filter element. Opening the purge valve can discharge loose solids, but particles wedged in the screen may still require removal and cleaning. Flushable does not mean maintenance-free. Rusco’s user guide distinguishes purging from screen cleaning.
When one is worth installing
A spin-down is a useful first stage when you repeatedly find coarse particles in faucet aerators, or when a downstream sediment cartridge fills with sand and grit. Manufacturers position these filters ahead of larger treatment systems to protect plumbing and downstream filtration. Rusco’s product literature identifies this prefilter role.
It is a less convincing choice when:
- Fine cloudiness is the main problem. Very fine clay or “flour sand” can pass through typical sediment filters; a finer treatment stage may be needed.
- Your cartridge already lasts well and coarse sediment is scarce. Another housing adds installation and maintenance without an obvious benefit.
- The problem is dissolved material rather than particles. A screen cannot substitute for treatment selected from water-test results.
Fine particles and dissolved iron require a different approach from loose sand; Extension’s sediment-filtration guide explains that distinction. Use the broader sediment filter guide if you are still deciding which filter type fits the problem.
Select the screen—and the housing
Do not confuse mesh with microns
Microns describe an opening or particle size; mesh numbers use a different scale. For a given screen series, higher mesh numbers mean finer screens, while higher micron numbers mean larger openings.
| Label | What it means in the cited product series |
|---|---|
| Rusco 100 mesh | Approximately 152 µm |
| Rusco 250 mesh | Approximately 61 µm |
| Rusco 500 mesh | Approximately 30 µm |
| iSpring WSP 100 micron | 100 µm pore rating—not 100 mesh |
The Rusco conversions are approximate and come from its January 2026 sizing guide; the WSP rating comes from its manufacturer manual. Use the exact screen’s published conversion rather than assuming matching numbers mean matching filtration.
Choose the coarsest screen that removes the particles you need to intercept. A finer screen may catch more, but it can also clog sooner. Both Rusco’s selection advice and the WSP manual warn against unnecessarily fine filtration. For mixed coarse and fine sediment, let the flushable stage catch grit and a downstream cartridge handle the finer fraction.
Check minimum flow, not just maximum flow
Match the connections, household demand and published pressure-loss data. A large advertised gallons-per-minute capacity does not establish the pressure available at your fixtures.
Oversizing also has a specific spin-down drawback: centrifugal separation may require a minimum flow. Rusco’s January 2026 guide lists 1–25 GPM for its 1-inch T- and Combo-style models and 10–50 GPM for its 1½-inch models in those styles. The lower figure is the minimum needed for “spin-out” action, not a claim that the screen stops filtering below it. A larger model is therefore not automatically better for a house with low-flow draws. The guide notes that L-style filters do not produce spin-out action. Check the model-specific guide.
Also verify the complete assembly’s pressure and temperature limits, replacement-screen availability and sediment storage space. Rusco’s Sediment Trapper variant provides additional collection volume for heavier sediment loads. Its FAQ explains the difference.
Plan installation around flushing and service
Install the unit before the equipment it is intended to protect, following the exact model’s instructions. For a well system, do not place a restrictive filter between the pump and its pressure switch: Rusco’s illustrated instructions specify installation after the pressure switch. Have the installer confirm the pressure-tank and switch arrangement. See the system diagram.
Before cutting pipe, confirm:
- Orientation: follow the flow arrow; Rusco prefers vertical installation with the purge outlet downward.
- Service clearance: leave room to remove the bowl and screen and attach a flush hose.
- Isolation: provide the shutoff arrangement required for safe disassembly; the WSP manual recommends inlet and outlet valves.
- Discharge: plan where flushing water will go, with any drain connection meeting local plumbing requirements.
- Protection: keep the assembly within its temperature limits and protected from freezing, impact, sunlight and incompatible chemicals.
These requirements are covered in the Rusco user guide and WSP installation manual. Connection types differ, so do not assume every 1-inch filter uses the same threaded fittings.
Flush loose sediment; clean a blocked screen
Inspect frequently during the first weeks to learn how quickly sediment accumulates. Follow your model’s flushing schedule, then flush more often if loading demands it. For example, the WSP manual, revised October 2019, calls for flushing at least weekly and inspecting the mesh monthly. Use the prescribed valve sequence—different designs do not necessarily flush the same way.
If purging does not restore flow, inspect the screen rather than repeatedly opening the drain:
- Shut off the supply and release pressure before unscrewing the bowl.
- Remove the screen and rinse off sediment. Rusco permits a soft brush for lodged particles.
- Inspect the screen, bowl and seals; use only cleaning agents and lubricants permitted by the manufacturer.
- Reassemble as instructed, reopen the supply and check for leaks. Rusco specifies hand tightening only. Its cleaning instructions cover this procedure.
Reusable does not mean permanent: both the Rusco user guide and WSP manual include screen-replacement intervals. Follow the instructions supplied with your model, not a universal replacement schedule.
Repeated screen blockage calls for checking screen fineness, sediment load and housing size—not automatically buying a finer screen. If the screen is clean but downstream cartridges still fill quickly, the remaining particles may be too fine for this stage. An automatic flush valve can handle scheduled purging, but it does not remove the need to inspect the screen and seals.