
How to Test pH Level in Water: Strips, Meters & Results
A practical, repeatable way to measure your water’s acidity.
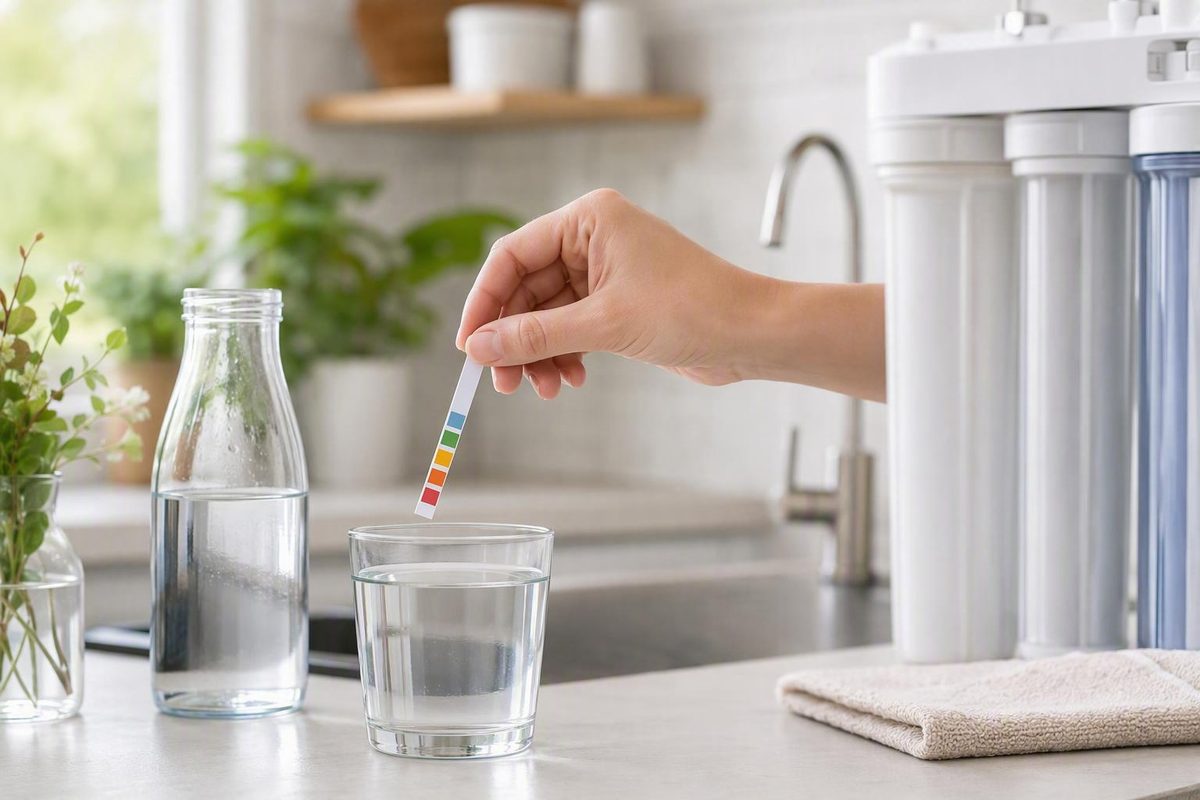
A practical, repeatable way to measure your water’s acidity.
Quick answer: choose the testing method by how much the result matters
To test water pH at home, collect a fresh sample in a clean cup and choose the method according to the consequences of a wrong result:
- For a rough check: use unexpired pH strips or a liquid color-comparison kit.
- For a repeatable numerical result: use a clean digital pH meter calibrated with fresh buffer solutions.
- For drinking-water safety, corrosion, livestock, treatment sizing, or process control: obtain broader laboratory analysis rather than relying on pH alone.
The practical question is not simply, “Which method is easiest?” It is, “What will I do with the result?” A strip may be adequate for deciding whether water is broadly acidic, near neutral, or alkaline. If the number will determine an aquarium adjustment, brewing step, corrosion investigation, chemical dose, or water-treatment purchase, verify it with a properly calibrated meter and test the other relevant water characteristics.
| Method | Result type | Subjectivity | Calibration | Maintenance | Typical use pattern | Best fit |
|---|---|---|---|---|---|---|
| pH strips | Approximate value or range | High; requires color matching | None | Keep dry, sealed, unexpired, and with the original chart | Occasional or portable checks | Fast screening |
| Liquid color kit | Approximate value or range | Moderate to high; requires color matching | Usually none; kit instructions control | Protect reagents from contamination and improper storage | Occasional checks | Screening with a comparator scale |
| Digital pH meter | Numerical reading | Low visual subjectivity | Required according to the meter manual | Cleaning, calibration, correct storage, and eventual probe replacement | Repeated or consequential measurements | Process monitoring and repeatability |
| Broader laboratory testing | pH plus selected water-chemistry results | Low user interpretation during measurement | Managed by the laboratory | Correct sampling, preservation, and shipping still matter | When risk or treatment decisions justify it | Wells, drinking-water concerns, corrosion, livestock, and treatment sizing |
Strips are portable, single-use indicators. Digital testers are reusable and avoid much of the uncertainty of matching colors, but they are dependable only when the electrode is calibrated, cleaned, stored, and maintained correctly. A laboratory-supply comparison accordingly presents strips as screening tools and meters as the stronger choice when repeatability matters, while noting that meters demand more care (comparison of pH strips and meters).
Whatever method you choose, the instrument manual or test-kit instructions override generic advice. Products differ in immersion depth, exposure time, color-development time, calibration points, stabilization criteria, cleaning, and storage.
Do not purchase or size treatment equipment from one strip result—or even one meter result. Repeat the measurement, verify the method, and investigate the rest of the relevant water chemistry first.
What a water pH number means—and what it cannot tell you
pH describes the acidic or basic condition of water and is related to hydrogen-ion activity. It is conventionally expressed on a scale from 0 to 14:
- Below 7: acidic
- 7: neutral under defined conditions
- Above 7: alkaline or basic
The scale is logarithmic rather than linear. A change of one pH unit corresponds to a tenfold change in hydrogen-ion activity, so the difference between pH 6 and pH 7 is not merely one ordinary, equal-sized step (EPA explanation of pH and its logarithmic scale).
Do not assume that every sample of pure, distilled, or deionized water will read exactly 7. Temperature and measurement conditions matter, and exposure to air allows carbon dioxide to dissolve in the sample and alter the observed value. Low-mineral water can also be difficult to measure reliably with an ordinary electrode.
pH is not alkalinity
These measurements are related but not interchangeable:
- pH describes the water’s current acidic or basic condition.
An ordinary pH strip or pH meter does not measure alkalinity.
pH is not a complete water-safety test
A pH test measures acidity or basicity. It does not identify or rule out:
- Lead or copper
- Bacteria, viruses, or other microorganisms
- Chlorine or chloramine
- Hardness
- Iron
- Total dissolved solids
- Most other chemicals or contaminants
A neutral or expected pH therefore does not prove that water is clean or safe to drink. At-home pH testing provides only one part of a water-quality assessment; broader testing is needed to investigate other water-quality concerns (limitations of home pH testing).
Prepare a fresh, representative water sample
Good measurement begins before the strip or probe touches the water. A contaminated cup or poorly chosen sample can undermine even an excellent instrument.
Pre-test checklist
Gather and check:
- A clean cup, glass, or beaker
- Fresh, correctly stored strips or liquid reagents
- The original color chart for the product
- A charged meter or good batteries
- Fresh, unexpired calibration buffers
- The correct probe filling or storage solution, if applicable
- Distilled or deionized rinse water if the meter instructions call for it
- The test-kit or meter manual
- A logbook or phone note for recording results
Use a container that has been thoroughly rinsed. Avoid cups with soap, cleaning-product, food, coffee, juice, or other beverage residue. If the container’s condition is uncertain, clean and rinse it completely before rinsing it again with the water being sampled.
Collect the sample
- Rinse the test container with sample water.
- Collect enough water to cover the strip’s active area or immerse the meter probe to its required line or reference junction.
- Test from the container rather than holding a strip or probe in running water, unless the specific instrument or protocol permits direct-flow testing.
- Test promptly.
Decide whether flushing fits the objective
- To characterize water supplied after routine use, follow the utility’s or laboratory’s applicable sampling directions.
- To investigate water that has stood in household plumbing, flushing first may remove the condition you intended to examine.
- If you are testing for lead or another specific hazard, follow the sampling protocol supplied by the relevant laboratory, utility, or public-health authority rather than substituting a generic pH procedure.
Minimize delay and document the conditions
Air exposure can change pH after collection. Archived EPA field guidance says a sample not measured in the field should be analyzed within two hours because atmospheric carbon dioxide can affect the result. For home testing, the simpler practice is to measure a fresh sample immediately or as soon as practical (archived EPA sampling guidance).
Record:
- Date and time
- Sample location
- Whether and how the faucet was flushed
- Water temperature
- Strip, color kit, or meter used
- Meter-calibration status
- Each reading
- Visible color or cloudiness
- Scale, staining, odor, or metallic-taste observations
When the result matters, take duplicate measurements. There is no universal acceptable difference for every application, but duplicates that disagree materially are a reason to investigate sampling, timing, calibration, or equipment before acting.
How to test water pH with strips or a liquid color kit
Color-based tests are convenient, inexpensive screening tools. Their principal limitation is that the result depends on chemical color development and a person’s interpretation of the resulting shade.
Using pH strips
-
Choose an appropriate range. Confirm that the strip’s measurement range includes the pH expected for your water or application. A narrow-range strip may have smaller color intervals than a wide-range product, but only its specifications establish what distinctions it can support.
-
Check the package. Confirm the expiration date and inspect the storage condition. Do not rely on strips exposed to moisture, direct sunlight, or temperatures outside the manufacturer’s stated limits.
-
Prepare a fresh sample. Use a clean, sample-rinsed container with enough water to wet the required reactive area.
-
Remove one strip correctly. Avoid touching its reactive pads. Close the package promptly so the remaining strips are not exposed to room humidity.
-
Dip it for the specified time. Immerse the indicated portion and make sure all required pads become wet. Some products require only a few seconds, while others differ. Follow the instructions supplied with your strips rather than borrowing a timing rule from another brand.
-
Handle excess water as directed. The product may tell you to shake, tap, or let the strip drip. Do not wipe the reactive area unless the instructions explicitly say to do so.
-
Wait for the stated development period. Reading too early or too late can change the apparent result.
-
Compare every relevant pad with the original chart. Read the strip under neutral white or daylight-quality light. Do not substitute a generic online chart because pad chemistry and color patterns differ among products.
-
Report only the precision the chart supports. If the color falls between marked values, record an estimate or range rather than inventing decimal places.
Strip interpretation can be affected by lighting, color perception, sample color or cloudiness, exposure time, handling after removal, and the delay before reading (factors affecting pH-strip interpretation).
If the shade is ambiguous, repeat the test with a fresh strip and a newly collected sample. If several strips do not react, try a properly stored strip from a fresh batch rather than assuming the water must be neutral.
Using a liquid color-comparison kit
- Rinse and fill the vial to the specified sample-volume mark.
- Add the exact number of reagent drops or tablets specified.
- Cap and mix in the manner directed; do not shake vigorously unless instructed.
- Wait for the required development time.
- Compare the resulting color with that kit’s scale under suitable lighting.
- Record the matching interval or range.
If a color-based result will affect water treatment, animal care, brewing, hydroponics, or another controlled process, confirm it with a calibrated meter suitable for the sample.
How to test water pH with a calibrated digital meter
A digital meter replaces visual color matching with an electrical measurement and numerical display. It can provide better repeatability, but it is not a maintenance-free truth machine.
1. Inspect the meter and probe
Before calibration, check:
- Battery or charge level
- Probe glass and body for cracks or damage
- Whether the electrode was stored correctly and kept hydrated as required
- Filling-solution level for refillable probes
- Expiration or replacement dates for the probe and buffers
- Deposits, fouling, trapped air, or a dry sensing bulb
If the probe was stored incorrectly, use the manufacturer’s conditioning procedure. Do not invent a soaking solution or duration.
2. Select the calibration procedure
Follow the meter manual to determine whether the instrument requires one-, two-, or three-point calibration. The appropriate scheme depends on the meter, expected sample range, required confidence, and manufacturer’s design.
Commonly referenced buffers include pH 4.01, 7.00, and 10.01. Portland’s municipal guidance lists those three standards for calibration verification while emphasizing that users must follow the meter manufacturer’s procedure (Portland Water Bureau pH-meter guidance).
3. Handle buffers without contaminating them
Pour a small amount of each buffer into a clean calibration cup. Keep stock bottles capped, and never pour used buffer back into the original bottle. Do not reuse a calibration portion after placing the probe in it.
Allow buffers and equipment to reach the conditions required by the instrument instructions. Label the cups when using multiple buffers so they cannot be confused.
4. Calibrate the meter
For each calibration point:
- Rinse the electrode with distilled or deionized water as directed.
- Remove rinse water using the method specified in the manual. Avoid rubbing a delicate glass bulb.
- Place the probe in the buffer to the required immersion depth.
- Keep the sensing bulb and reference junction appropriately submerged.
- Avoid resting or scraping the sensor against the cup.
- Allow the reading to satisfy the meter’s stability criterion.
- Accept or set the calibration point according to the controls.
- Rinse before moving to the next buffer.
There is no universal stabilization time or calibration frequency. Follow the instrument’s indicator and manual.
5. Measure the sample
- Rinse the probe after calibration.
- Place it in the fresh sample to the marked immersion line or deep enough to cover the reference junction.
- Keep it clear of the container walls and bottom unless contact is permitted.
- Stir gently only if the prescribed method calls for it.
- Check for trapped bubbles around the sensing area.
- Wait for the stability indicator or defined stabilization criterion.
- Record the pH and sample temperature.
- Repeat with another portion if the result is consequential or unexpected.
A display showing two decimal places has that level of resolution. It is not automatically accurate to two decimal places. Accuracy also depends on calibration, electrode health, sample characteristics, temperature handling, and technique.
6. Rinse and store the probe
After measurement, rinse the electrode and return it to the storage solution specified by the manufacturer. Wet-bulb electrodes generally should not be stored in distilled or deionized water. Replace the cap carefully and maintain the filling solution if the probe is refillable.
7. Perform a quick quality-control check
If the reading drifts, appears implausible, or differs sharply from previous results:
- Rinse the probe.
- Place it in a fresh portion of a known buffer.
- Check whether it returns to the expected value within the instrument’s acceptance criteria.
- Recalibrate if verification fails.
- Clean, condition, or service the probe according to the manual if it still cannot verify.
Do not adjust the water based on a reading from a meter that cannot pass its own buffer check.
Interpret the result in the context of its intended use
Begin with the limited conclusion that pH supports:
- Below 7: the sample is acidic.
- Around 7: it is near neutral under the measurement conditions.
- Above 7: it is alkaline or basic.
These categories describe acidity or basicity; they do not establish overall water safety.
Household drinking water
For U.S. household drinking water, 6.5 to 8.5 is often cited in water-treatment guidance as a secondary aesthetic and operational range rather than a health-based guarantee. Because the supplied evidence does not establish a current primary EPA page for that characterization, confirm the applicable range with current official or local guidance before treating it as a regulatory benchmark (commercial water-testing guide describing the secondary range).
For municipal tap water, compare your measurement with current information from your utility. Utilities may intentionally adjust pH, and expected values vary with the source, treatment process, and distribution system. If your home result differs substantially, verify the sampling method, strip, or meter before assuming the supplied water has changed.
Low pH and corrosion clues
Acidic water can contribute to plumbing corrosion and increase the dissolution of metals such as copper and lead. A low-pH result does not prove that either metal is present; that requires an appropriate metal test.
Possible reasons to investigate further include:
- Metallic taste
- Blue or blue-green staining
- Rust-colored staining
- Pinhole leaks or visible plumbing corrosion
- Premature deterioration of water-using equipment
These are clues, not diagnoses.
Higher pH and scaling clues
Higher-pH water may be associated with bitter taste, mineral scale, and reduced efficiency in water-using appliances.
Do not transfer one target to every use
Household drinking-water guidance does not define the appropriate pH for:
- Aquariums
- Pools and spas
- Hydroponics
- Brewing
- Livestock water
- Streams or environmental monitoring
- Industrial or food processes
In an aquarium, for example, an accurate pH number is useful only when interpreted alongside species requirements and related chemistry. In brewing, pH measured at one process stage is not interchangeable with the pH of the source water.
Do not choose or size a neutralizer, softener, dosing pump, or other treatment system from one pH measurement. Confirm the result and assess alkalinity, hardness, iron, metals, and any other relevant parameters first.
Troubleshoot strips and meters that disagree, drift, or look wrong
Use a fixed sequence: sample first, test materials second, calibration third, and the instrument last. This helps prevent unnecessary probe replacement when the real problem is stale water, a contaminated cup, or damaged strips.
1. Check the sample
Ask:
- Was the sample fresh?
- Was the container free from soap, cleaner, food, and beverage residue?
- Was the cup rinsed with sample water?
- Was the intended source or outlet sampled?
- Did the sample sit open to air?
- Was it unusually hot, cold, colored, or cloudy?
- Were duplicate tests performed on comparable samples?
Collect a new sample under controlled conditions if any answer creates doubt.
2. Check strips or reagents
For strips, verify:
- Expiration date
- Dry, sealed storage
- Protection from sunlight and extreme temperatures
- A suitable pH range
- Correct immersion time
- Correct development time
- Correct handling of excess water
- Neutral white lighting
- Use of the original package chart
A colored or cloudy sample can mask the indicator color. Differences in color perception can also lead two people to assign different values to the same strip. If several strips fail to change, use a properly stored strip from a fresh batch.
For liquid kits, verify the sample volume, reagent quantity, reagent age, mixing method, development time, and comparator cleanliness.
3. Verify meter calibration
Use fresh portions of unexpired buffer. Make sure the buffer was not returned to its stock bottle, diluted by rinse water, or contaminated by moving the probe directly between solutions.
Recheck the meter in a known buffer. If it misses the accepted value, recalibrate according to the manual. If calibration repeatedly fails, inspect the probe and instrument.
4. Inspect the probe and meter
Possible causes of poor meter performance include:
- Weak batteries
- Expired or contaminated buffer
- Incorrect immersion depth
- A reference junction above the sample
- Air bubbles around the sensing bulb
- Fouling or mineral deposits
- Low filling solution
- A dry, aging, cracked, or otherwise damaged electrode
- Incorrect storage
- A probe unsuitable for the sample
A fixed, sluggish, steadily drifting, or erratic display may reflect calibration or electrode failure rather than real changes in the water.
Temperature compensation has limits
Temperature can affect both the sample’s pH and the electrode response.
Record the sample temperature and follow the meter’s procedure rather than applying an improvised correction.
Low-mineral water can be difficult to measure
A municipal water-utility guide specifically recommends a probe designed for low-ionic-strength water when that condition applies. It also warns that batteries, fouling, expired probes, improper immersion, and poor storage can compromise readings (guidance for low-ionic-strength water and probe care).
Do not assume that a drifting display means the water’s true pH is changing rapidly. Minimize unnecessary exposure to air, use a suitable probe where needed, and allow stabilization according to the instrument instructions.
If strips and a meter disagree
Do not automatically trust the digital display merely because it includes decimals. Instead:
- Collect a fresh sample.
- Repeat the strip test with a fresh strip and correct lighting.
- Confirm the immersion and development timing.
- Verify the meter with fresh buffer.
- Rinse and immerse the probe correctly.
- Repeat both measurements.
- Compare the strip’s broad interval with the verified meter result.
A small difference may reflect the strip’s coarse color intervals. A large difference requires investigation. Replace or professionally service a probe that cannot pass calibration or buffer verification after the recommended cleaning and conditioning steps.
Know when pH testing is not enough
Broader analysis is appropriate when the concern involves:
- Drinking-water safety
- A private well
- Persistent staining or corrosion
- Unexplained taste or odor
- Suspected lead or other metals
- Possible microbial contamination
- Livestock water
- Treatment selection or sizing
- A process in which an incorrect result has meaningful consequences
The principal value is often not simply another pH result but the accompanying chemistry. Depending on the problem, testing may include alkalinity, hardness, iron, copper, lead, disinfectant residual, total dissolved solids, or microbial indicators.
Because pH can change after collection, prompt onsite measurement may be preferable for pH itself even when other samples are sent to a laboratory.
If lead, microorganisms, or another specific hazard is suspected, follow the contaminant-specific instructions supplied by the relevant laboratory or public-health authority. A pH reading cannot substitute for a test that measures the hazard itself.
Homemade red-cabbage or blueberry indicators are useful chemistry demonstrations. Their pigments change color in response to acidity or basicity, but without controlled preparation and calibration they cannot provide a dependable numerical result or establish water safety (DIY plant-indicator activity).
Before buying treatment, follow this action ladder:
- Document the first reading and how it was obtained.
- Repeat it under controlled conditions with a fresh sample and clean equipment.
- Confirm it with a calibrated meter if the original method was color-based.
- Compare it with source information, including current utility data for municipal water.
- Order the additional tests relevant to the actual concern.
- Select treatment only after the result and surrounding chemistry are understood.
The verification-first checklist is short: collect a fresh sample, use clean equipment, follow the exact strip or meter instructions, repeat the measurement, and investigate handling or calibration before accepting an unexpected number as real. pH is useful for identifying acidic or alkaline conditions and potential corrosion or scaling concerns, but it cannot establish overall water safety or determine treatment by itself.
Frequently asked questions
Can I test water pH without a test kit?
You can make a rough indicator from red cabbage or blueberries. The color change can demonstrate whether a sample is broadly acidic or basic, but it is not a dependable numerical pH measurement. Preparation water, ingredient concentration, lighting, and the indicator itself can affect the observed color.
For anything beyond an educational demonstration, use proper pH strips, a color kit, or a calibrated meter. A homemade indicator cannot show that water is safe.
Are pH strips accurate enough for drinking water?
They can be adequate for a rough screen, such as checking whether a sample appears broadly acidic, near neutral, or alkaline. Their usefulness depends on the strip range, color intervals, storage, expiration, lighting, sample appearance, and correct timing.
They cannot establish drinking-water safety because pH does not identify contaminants. If the result will guide a corrosion investigation or treatment decision, confirm it with a calibrated meter and obtain the other relevant tests.
Why do my pH strips and digital meter give different readings?
Common causes include coarse strip intervals, subjective color matching, poor lighting, expired or damp strips, incorrect timing, colored water, contaminated buffer, calibration drift, incorrect probe depth, a fouled or dry electrode, temperature effects, or low-mineral water.
Repeat both methods using a fresh sample and fresh strip. Then verify the meter in fresh buffer. Accept the result only after the measurement method passes those checks.
Does a normal pH mean my water is safe to drink?
No. A normal or expected pH indicates only the sample’s acidic or basic condition under the test conditions. It does not rule out metals, microorganisms, disinfectants, hardness, dissolved solids, or other contaminants.
Use hazard-specific sampling and laboratory analysis when drinking-water safety is the concern.
How soon after collecting water should I test its pH?
Test it as soon as practical, ideally immediately after collection. Exposure to air can alter the sample as carbon dioxide dissolves into it, and low-mineral water can be particularly difficult to measure consistently.
Archived field guidance uses a short holding period for samples not measured onsite, but that is not a reason to wait. Prompt measurement in a clean container is the better home-testing practice.